
| Command | Description |
|---|---|
git remote |
Manages remote repositories |
git clone |
Creates a local copy of a repository |
git pull |
Fetches and merges the latest changes from a remote repository into the current branch |
git fetch |
Updates remote tracking branches |
git push |
Uploads local commits to a remote repository |
Session 6: Integration with GitHub / GitLab
Track, organize and share your work: An introduction to Git for research
Course at General Psychology Lab at the University of Hamburg
![]()
![]()
13:30
1 Last session: Branches
Last session: Learning objectives
After the last session, you should now be able to answer the following questions / do the following:
💡 You understand the purpose and benefits of using branches in Git.
💡 You can create and switch between branches.
💡 You can merge branches and resolve merge conflicts.
💡 You can name at least three best practices when working with branches.
Last session: recipes project
At the end of this session, you should have accomplished the following:
- You created a new branch and merged changes to your default branch.
- 🚀 Optional: You created and resolved a merge conflict.
Please keep the recipes folder! We will continue to use it in the following sessions.
2 This session: Integration with GitHub / GitLab
Integration with GitHub / GitLab
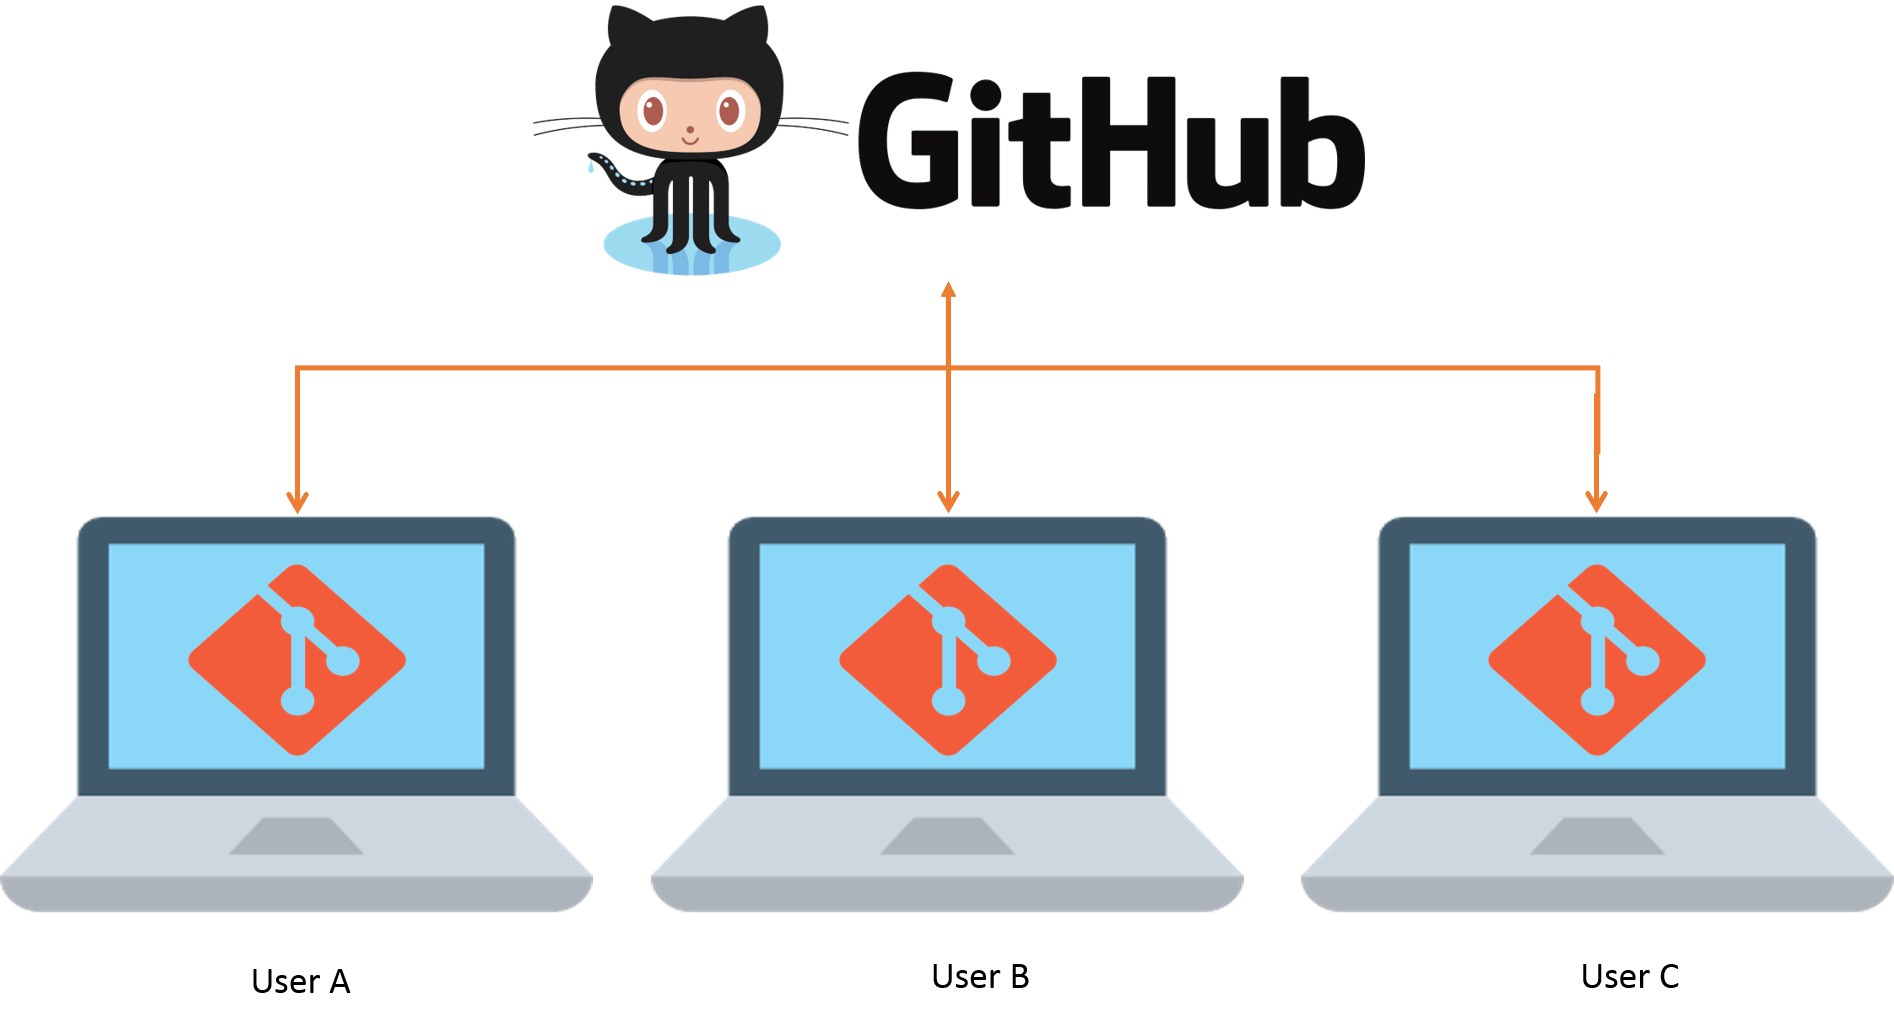
Image from Techdobz
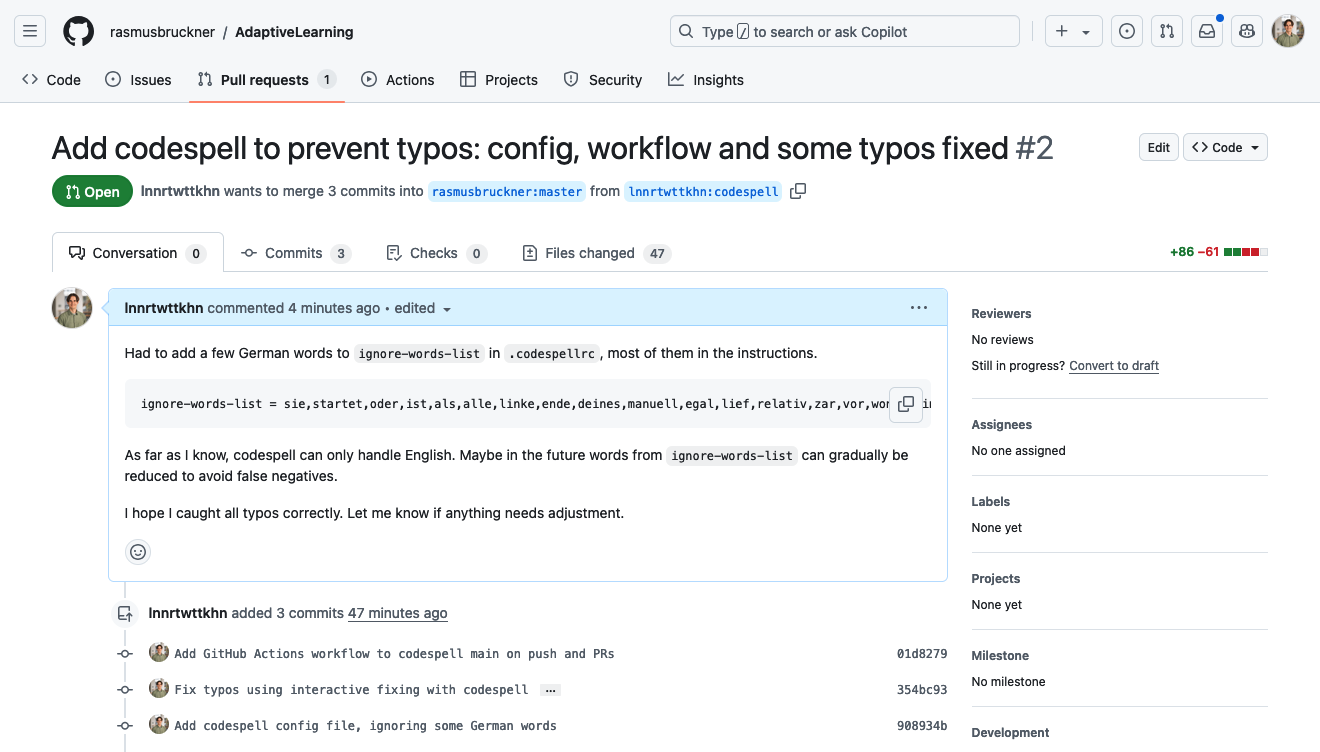
This session: Pull Requests
Reading
https://lennartwittkuhn.com/version-control-book/chapters/remotes-intro.html
Learning objectives
💡 You can create a remote repository.
💡 You can connect your local Git to a remote repository service.
💡 You can pull and push changes to and from a remote repository.
💡 You can clone a repository from a remote repository service.
Cheatsheet
Tasks
In this session, you will work on the following tasks:
- Reading: Read the chapter “Remotes - Introduction” in the Version Control Book.
- Implementation: Try out the commands in the chapter.
- Exercises: Work on the exercises for the
recipesproject. - Quiz: Test your knowledge with the quiz.
As always:
- Try out the commands of this session and play around with them.
- Check whether you have achieved the learning objectives.
- Ask questions!
- Let’s git started!
recipes project
At the end of this session, you should have accomplished the following:
- You connected your GitHub account to your local Git.
- You created a new GitHub repository and uploaded (i.e., “pushed”) your
recipesproject. - You collaborated on a shared project by adding and committing changes to a partner’s repository.
Optional:
- You cleaned up your project by deleting unnecessary files and branches.
- You created a short
README.mdfile in your repository.
Please keep the recipes folder! We will continue to use it in the following sessions.
Exercises 1
Connect to remote repositories using SSH
- Generate an SSH key.
- Copy the SSH key to your clipboard.
- Add the SSH key to the remote repository (for example, GitHub or GitLab).
Upload your local repository to a remote repository
- Create an empty repository on the remote repository hosting platform, for example GitHub or GitLab. Make sure to not initialize the repository with any files!
- If needed, navigate to the
recipesrepository using the command line. - Set the remote URL of your local repository to your remote repository.
- Push the changes on your
mainbranch to your remote repository.
Exercises 2
“Private” collaboration with pull requests (using GitHub Flow)
- Add your exercise partner as a collaborator to your
recipesrepository. - Clone your partner’s repository.
- Create a new branch in your collaborator’s repository.
- Add a recipe to your collaborator’s
recipes.txtfile. - Add and commit the changes.
- Push the changes on the new branch to the remote repository.
- Create a Pull / Merge Request.
- Review the PR your collaborator made in your repository.
- 🚀 Optional: Add additional changes on the branch pushed by your collaborator.
- Merge the PR into your repository.
🚀 Bonus exercises
Add a README.md
- Find the option to create a new file on your remote repository in the browser.
- Name the file
README.md, add a brief description, and provide a commit message. - 🚀 Optional: Play around with Markdown syntax.
- Save the
README.mdfile to the repository. - Pull the changes to your local repository.
Clone and sync your repository
- Move to a location on your computer where you want to clone a repository.
- Clone your remote repository to a different location on your computer.
- Stage and commit changes in the new location (consider using a new branch).
- Push these new changes to GitHub.
- Pull the changes to the repository in the original location.
- Delete your newly cloned repository.
Solutions
Connect to remote repositories using SSH
- In the command line, create a new SSH key. Make sure to change the example email to your email address. Optionally, provide a passphrase.
- Copy the SSH key to your clipboard. Here, we use
catto print the contents of the SSH key to the command line. Copy the contents displayed in the Terminal to your clipboard. - Add the SSH key to your remote repository account.
Solutions
Upload your local repository to a remote repository
- To create an empty repository on GitHub: (1) Go to GitHub and click the
+icon in the upper-right corner, then selectNew repository. (2) Name your repository. (3) Do not selectInitialize this repository with a README. (4) ClickCreate repository. - Optional: Navigate into the
recipesrepository usingcd(or a similar path). - Set the remote URL of the local repository to the repository using
git remote add origin <URL>. Remember to use the correct<URL>depending on whether you authentication method (typically SSH or PAT). - Push the changes on the
mainbranch to the remote repository usinggit push -u origin main.
Solutions
“Private” collaboration with pull requests (using GitHub Flow)
Code
#!/bin/bash

# Add your exercise partner as a collaborator to your recipes repository # <1>
cd ~ # <2>
git clone https://github.com/partner-username/partner-repo-name.git  # <3>
git checkout -b new-branch-name # <4>
echo "New Recipe" >> recipes.txt # <5>
git add recipes.txt  # <6>
git commit -m "Add new recipe to recipes.txt" # <6>
git push origin new-branch-name # <7>
# Create a Pull / Merge Request. # <8>
# Review the PR your partner made in your repository. # <9>
# Merge the PR into your repository. # <10>- Add your exercise partner as a collaborator to your
recipesrepository: (1) Go to your repository on GitHub. (2) Click onSettings. (2) Click onManage accessin the left sidebar. (3) ClickInvite a collaboratorand enter your partner’s GitHub username. - Move to the location on your computer where you would like to clone your partner’s repository into, using
cdin the command line. Here, wecdinto the user’s home directory (~). - Clone your partner’s repository using
git clone. Make sure that you not cloning into an existing repository. - Create a new branch in your partner’s repository.
- Add a recipe to your partner’s
recipes.txtfile. - Add and commit the changes using a descriptive commit message.
- Push the changes on the new branch to GitHub.
- Create a Pull Request: (1) Go to your partner’s repository on GitHub. (2) Click
Compare & pull requestfor your branch. (3) Provide a title and description, then clickCreate pull request. - Review the PR your partner made in your repository: (19) Go to your repository on GitHub. (2) Click on the
Pull requeststab. (3) Click on the PR made by your partner. (4) Review the changes and provide feedback. - Merge the PR into your repository: (1) After reviewing, click the green
Merge pull requestbutton. (2) ClickConfirm merge.
Solutions
Add a README.md
- In your browser, go to your remote repository (for example, on GitHub), click
Add file, and selectCreate new file. - Name the file
README.md. Add a brief description of your project. Provide a descriptive commit message at the bottom. - Play around with Markdown syntax
- Click the green
Commit new filebutton to save theREADME.mdfile to the repository. - Use
git pull origin mainto pull the changes to your local repository.
Solutions
Clone and sync your repository
Code
#!/bin/bash

cd /new/location/for/repo # <1>
git clone https://github.com/your-username/your-repo-name.git /new/location/for/repo # <2>
git checkout -b new-branch # <3>
echo "New Recipe" >> recipes.txt # <3>
git add recipes.txt  # <3>
git commit -m "Add new recipe to recipes.txt" # <3>
git push -u origin new-branch # <4>
cd /original/location/for/repo # <5>
git fetch # <5>
git switch new-branch # <5>
rm -rf /new/location/for/repo # <6>- Move to the location on your computer where you would like to clone your own repository into, using
cdin the command line. - Clone your repository from GitHub to a different location on your computer.
- Stage and commit changes in the new location (consider using a new branch).
- Push the new changes to GitHub.
- Fetch these new changes to the repository in the original location.
- Delete your newly cloned repository.
3 Appendix
Cloning
Cloning
- Remember to clone a repo in a sensible location (not in your own repository)
- To rename the cloned repo you can use:
git clone <URL> new-folder-name
Version Control Course