Code
echo $SHELLIn this chapter, we will explore the command line and discover some commands that work well alongside Git.
Git is primarily a command-line tool. Learning basic command-line skills is generally recommended. However, if you use Git only through RStudio, you can skip this chapter for now. We will use the command line just once to set up Git for the first time. For more information, see the chapter on setup.
You are most likely used to interacting with programs on your computer through graphical user interfaces (GUIs) where you can select options through graphical icons and visual indicators using the computer mouse. However, computers have historically been controlled through text-based commands typed into command-line interfaces (CLIs) using the computer keyboard. To this day, the command line has persisted as a reliable (and sometimes the only) way to interact effectively with computer programs. Similarly, even though many GUIs for Git exist (for an overview, see the chapter on Graphical User Interfaces), Git is fundamentally a command-line tool. This is why comfort with the command line is a good basis for learning Git. For more general advantages of the command line, see Tip 2.1.
Before we begin with the basics of the command line, let’s start by defining some key terms that you will frequently encounter throughout this book:
A file is a unit of digital data storage that can contain a variety of information, such as text, images or even programs. It is identified by a unique name and a file extension, which indicates the file’s format or type (for example, file.txt for a plain text file). Files are organized within a file system, allowing users to create, access, modify, and delete them.
A folder is a container used in file systems to store and organize files and other folders. Folders provide a hierarchical structure that allows users to group and manage files, making it easier to locate and navigate through data.
A directory is a more technical term for a folder, while folder is a user-friendly term for the same concept. In practice, the two terms are often used interchangeably and many operating systems have adopted the term “folder”.
The command-line interface (CLI) is a text-based way to interact with computer programs. Specifically, the term “command line” refers to the interface where users input text commands to communicate with the computer. Most people primarily use a Graphical User Interface (GUI) to work with programs on their computer, but historically, text-based interfaces were more common. Often, the GUI can only access a limited set of features available through the CLI and some programs don’t even have a GUI and can only be used through the command line. This text-based interaction allows to perform various tasks, from running programs to managing files and folders.
The terminal, short for “terminal emulator”, is the application or program that you open on your computer to access the command-line interface. Terminals were used to connect to mainframe computers in the early days of computing. The terminal program creates a window in which you can type commands and see the output from these commands.
The shell is a software that interprets the commands you type into the terminal. It acts as a layer between you and the operating system. The shell processes the commands and communicates with the computer’s operating system to execute them. It allows you to perform various tasks that your operating system offers, such as managing files, running and stopping programs, and changing system settings, all through text commands. Examples of popular shells include Bash on Linux and macOS, and PowerShell on Windows.
In combination, in a typical scenario, you would open a terminal (the window), use the shell within that terminal to understand and process your commands, and interact with your computer through the command line interface provided by the terminal. That being said, the terms “shell”, “command line”, “command-line interface (CLI)”, and “terminal” are often used interchangeably and roughly refer to the same thing: a simple window showing a prompt and a blinking cursor (see Figure 2.1). In movies, when people hack into computers, they often type rapidly in this window.
As briefly described in the section on terminology, the default “programming language” of the command line is a version of the Shell. Examples of popular shells include Bash on Linux and macOS, and PowerShell on Windows. The program Git for Windows provides a Bash emulation that is used to run Git from the command line which generally behaves like Bash in Linux and macOS environments.
This section helps you finding the command line on your operating system. Click on the tab for your operating system or computer environment for detailed information.
To use Git effectively on Windows, you need access to a Unix Shell environment, which is not natively available on Windows systems. Unix Shells, such as Bash, provide the most comprehensive access to Git’s features and are the standard tool for interacting with Git. This is why installing an emulator like Git Bash is necessary. In this guide, we recommend using an emulator provided by Git for Windows, which grants you access to both the Bash shell and Git commands.
For an installation guide, you can check out the chapters on Installation and Setup. Once you have installed Git for Windows, you can open a terminal by launching the program called “Git Bash” from the Windows start menu.
On macOS, you can access your default shell through the Terminal program (see the icon in Figure 2.3) that can be found in the Utilities folder: There are (at least) three different ways to get there:
Applications > Utilities > Terminal.appGo menu > Utilities > Terminal.appSpotlight search function, type Terminal in the search bar, and press the EnterEnter key.You may want to keep the Terminal in your Dock to find it more easily, as shown in Figure 2.4.

On new Apple computers, especially those running recent versions of macOS, you might have to allow the Terminal access to certain files and folders after your initial commands. If a prompt appears asking for permission, you will need to confirm it to continue using Terminal with access to these files.
On an Apple computer running macOS Mojave or earlier versions, the default Unix Shell is Bash. Unix is a family of operating systems serving as the basis for Linux and macOS with the inclusion of a command line interface (or Unix Shell) as a key feature. For an Apple computer operating on macOS Catalina or later releases, the default Unix Shell is Zsh. Bash and Zsh are both programs, which are command-line interfaces for interacting with an operating system. Zsh is often considered better than Bash for its more advanced features and improved scripting capabilities. It also has extensive community-contributed plugins and themes. However, the change to Zsh was not a drastic shift for most users, since there a few practical differences.
To verify if your machine is configured to use a shell other than Bash, you can type the following command in your terminal window (you will learn about the command that is used here, echo, in this chapter):
Code
echo $SHELLIf the output is /bin/bash or a similar path, it means your default shell is set to Bash. This is the most common shell on Unix-based systems, including macOS.
If the output is /bin/zsh or a similar path, it means your default shell is set to Zsh.
If the output is a different path, it indicates that your shell is configured to use a different shell program. If your machine is configured to use a shell other than Bash, you can switch to Bash by opening a terminal and typing bash.
For example, you can check out Oh My Zsh.
Oh My Zsh is a delightful, open source, community-driven framework for managing your Zsh configuration. It comes bundled with thousands of helpful functions, helpers, plugins, themes,
In addition, if you want to add syntax highlighting (similar to the code chunks in this book), check out zsh-syntax-highlighting.
To open a fresh terminal window on Linux, you can usually use a keyboard shortcut, which often involves pressing CtrlCtrl (control) + AltAlt + TT simultaneously. If this shortcut does not work, you can find the terminal application in your system’s applications menu and click on it to open a new window. Additionally, if you are already in a graphical environment, right-clicking on the desktop or within a file manager may offer an option to open a terminal in the current location.
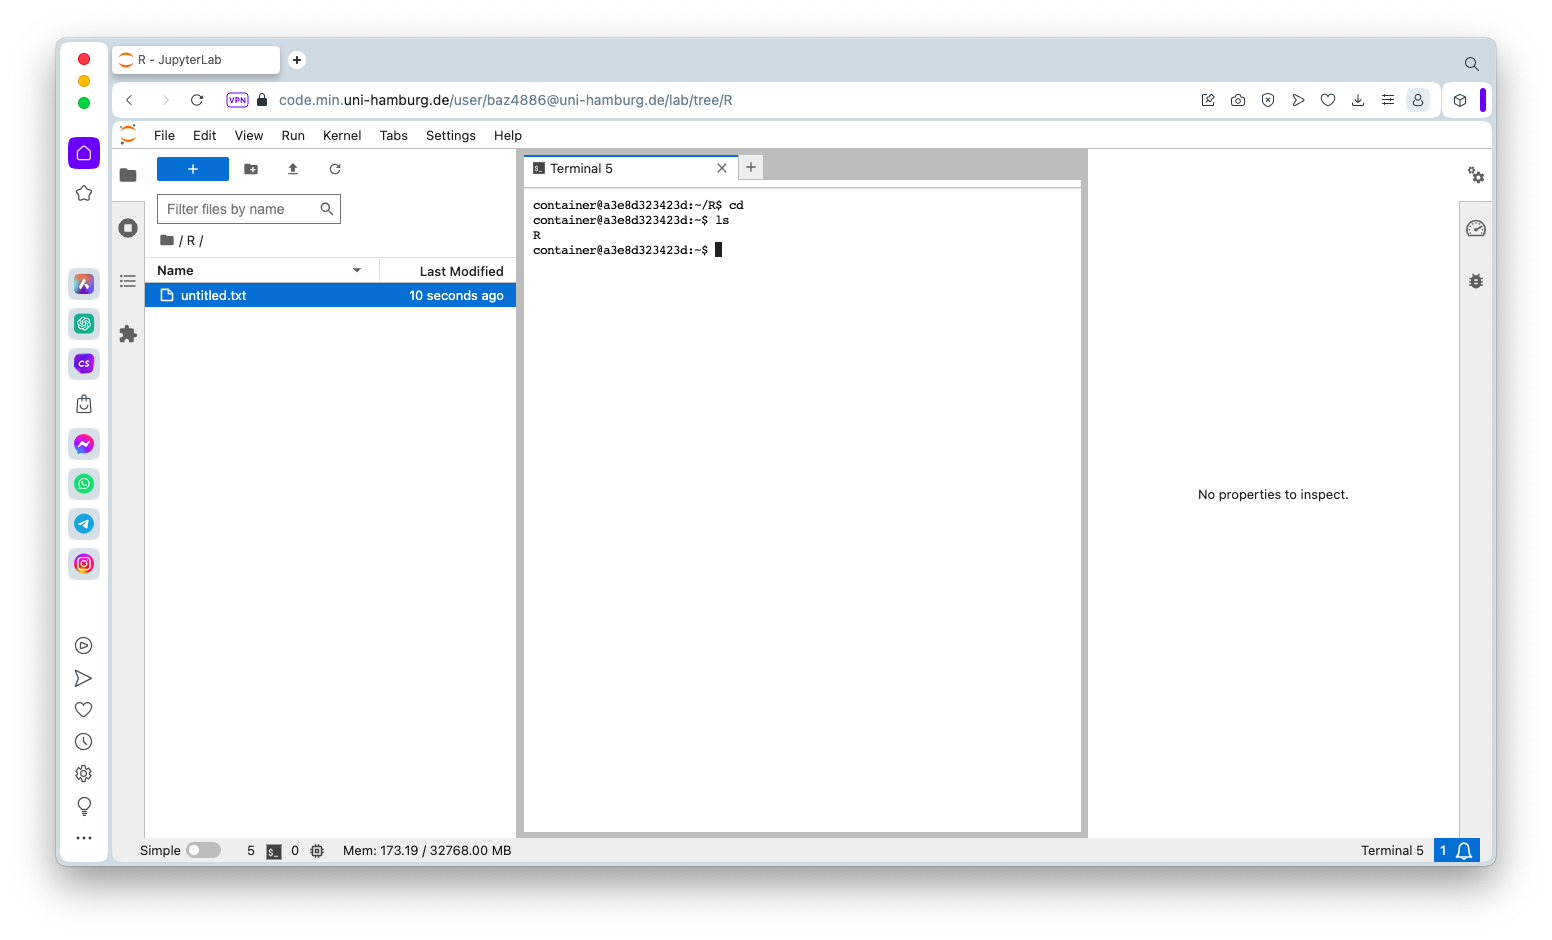
If it is not possible for you to access a command line interface using your personal computer, you can use a remote solution with JupyterHub. JupyterHub is a web-based platform that allows multiple users to access an interactive computing environment on a shared server.
If you are a student at University of Hamburg, you can access a remote environment, using your university login credentials here:
https://code.min.uni-hamburg.de
Simply click on the link and log in.
Once you are logged in, you should be able to view the remote environment and create files using different programs like , Python or Java .
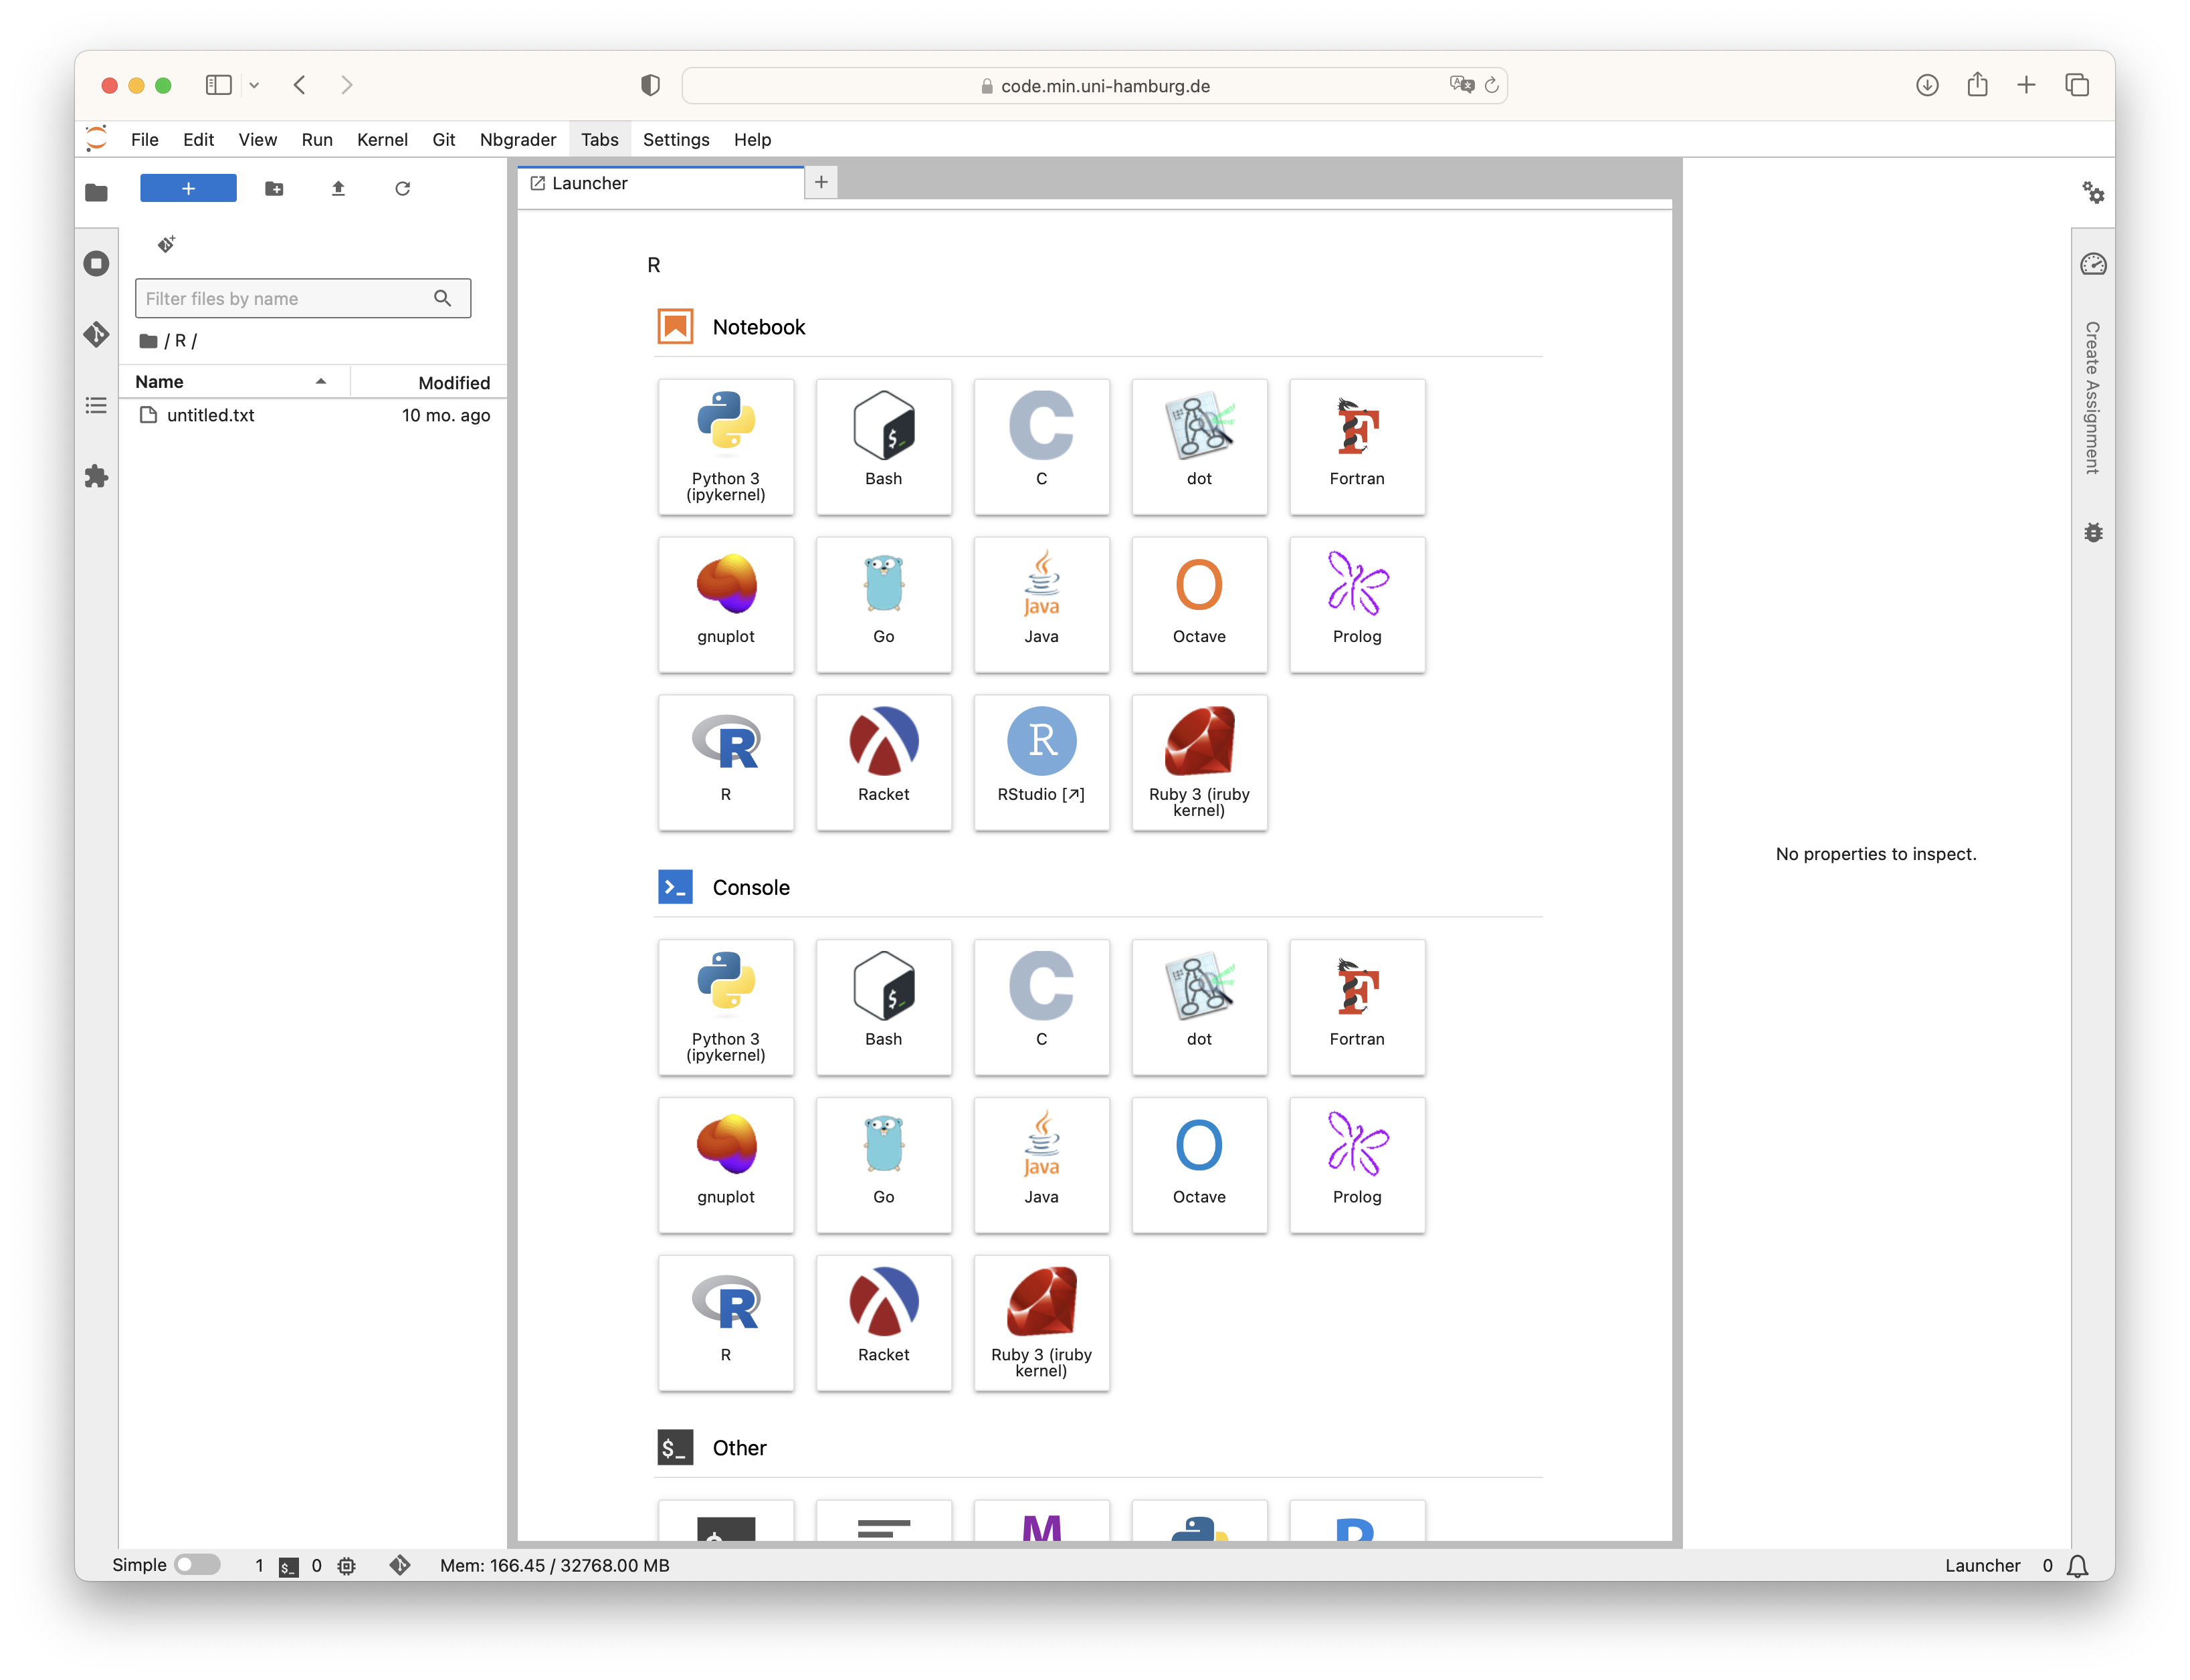
If you scroll down in the “launcher” window, there should be the option to open a terminal window. Your remote environment will be mostly empty, but you can move around and manage files just like you could on your own computer.
When you open the command line, you’ll see a prompt that tells you that the shell is ready for input. Your terminal interface will usually show a message similar to the following prompt:
Output
$In the shell, the prompt is usually represented by the symbol $ but it can look a bit different sometimes. In our examples, we will use $ as the prompt. The important thing to remember is to not type the prompt, $, itself when entering commands. Only type the command that comes after the $ prompt. For this reason, we remove the $ prompt from all code examples in this guide. Also, remember to press the EnterEnter key after typing a command to execute it.
After the prompt, you’ll see a text cursor that shows where you can type. The cursor can be a flashing or solid block, or it can be an underscore or a pipe symbol. You may have seen a similar cursor in a text editing program.
Keep in mind that your prompt may look slightly different. Usually, in popular shell environments, your username and the host name appear before the $ symbol. For example, your prompt might look like this:
Output
wittkuhn@lip-osx-005509:~$In this section, we provide some tips and tricks to help you become more efficient when using the command line and execute commands cleanly.
Unfortunately this feature is not available in all basic Shell versions. In Zsh and Powershell the autocompletion feature described here is available by default. In Bash, extensions have to be installed to get the same effect.
While using the command line in Zsh or Powershell, instead of typing out the full command or path, you can press the ⇥⇥ (Tab) key to automatically complete the rest of the command. Begin typing a command or the initial letters of a file or directory, for example:
Code
cd ~/DocOnce you’ve typed a portion of the command or path, press the ⇥⇥ key. The command-line interface will attempt to auto-complete the command or path based on what matches your input. In this example, it will :
Code
$ cd ~/DocumentsIf there are multiple possibilities, pressing ⇥⇥ again will cycle through the available options, for example:
Output
$ cd ~/Do
Documents/  Downloads/
Similarly, in Bash, when pressing ⇥⇥ twice, it will return a list of the possible options, but won’t cycle through them.
For Zsh and Powershell, autocompletion also works for system commands. For example, typing ls (you will find out more about this command below) and pressing ⇥⇥ might complete it to ls -l or ls -a. Auto-completion also works for the Git commands that will be introduced in the following chapters of this book. You can also cycle backwards through autocompleted options by holding ShiftShift (Shift), then pressing ⇥⇥.
Using the Up and Down arrow keys on your keyboard allows you to quickly access and reuse commands without retyping them.
After executing one or multiple commands, pressing the Up arrow key retrieves the most recent command. If you’ve navigated back using the Up arrow, pressing the Down arrow key moves you forward through the command history. You can continue to press Up and Down to cycle through the executed commands. To execute a command, hit EnterEnter, or you can edit it as needed before execution.
The main benefit of this is time efficiency. Instead of typing out the entire command, especially for lengthy or complex commands, you can retrieve and modify previous commands quickly. It also minimizes the chances of introducing typos or syntax errors when reusing commands. And it’s also the reason why the Up arrow key is among the earliest that needs replacement on software developers’ keyboards.
The clear command is used to clear the content of your terminal, providing a clean and empty slate. It helps improve visibility by removing previous commands, outputs, and clutter from your terminal window.
To clear the content of the terminal screen, type and execute the clear command:
Code
clearPress EnterEnter and the terminal screen will be cleared, leaving only a new prompt at the top of the window.
When you exit the command line, your command history is not automatically saved by default. To review the commands you’ve used, you can use the history command, which works on both macOS and Windows (when using Git Bash).
If you’re interested in keeping your command history for documentation or learning purposes, you can easily save either your current session’s history or the entire history stored by your terminal to a text file using the following command:
Code
history > history.txtThis command will capture your entire command history and save it to a file named history.txt in your current directory. You can then view this file directly from the command line or through your usual file viewer.
Do you want to abort a command? You can usually abort commands by simultaneously typing:
Ctrl + C (Control + C)
This sends an interrupt signal (SIGINT) to the process, which usually terminates it.
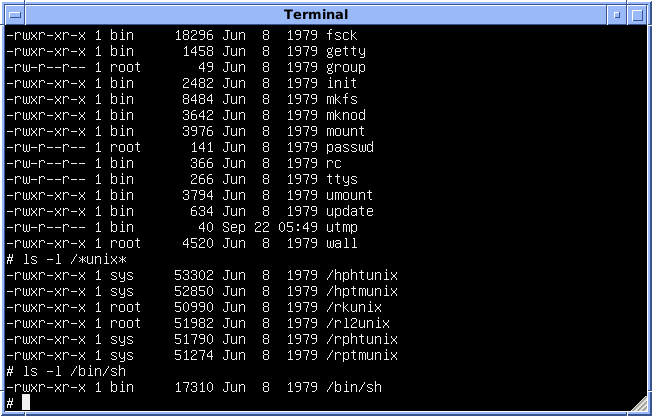
The ls command is used to list the files and folders in a specified directory or the current working directory. If you run this command, you will see the contents of your current working directory.
Code
lsls command executed in the project directory of this guide.
CITATION.cff
LICENSE
Makefile
README.md
_affiliations.yml
_authors.yml
_book
_courses.yml
_extensions
_metadata.yml
_quarto.yml
_variables.yml
chapters
cheatsheet.json
chicago-author-date-note.csl
city-guide
code
contents-listing.json
contents.html
contents.qmd
custom.scss
exercises
exercises-repos
faq
functions.R
github-buttons.html
images
index.html
index.qmd
misc
objectives
plausible.html
recipes
references.bib
renv
renv.lock
site_libs
static
usecases
version-control-book.Rproj
However, the ls command provides various options, such as flags and arguments, to extend its functionality beyond simple file listing. To provide additional instructions to a command, we can pass flags and arguments by typing them after the command name.
To list files in a specific folder (relative to the current working directory), we use the ls command followed by the name of the folder. For example, we can list the contents of the chapters folder in the project directory of this guide. In this case, chapters is a so-called “argument” to the ls command.
Code
ls chaptersbranches-advanced.qmd
branches.qmd
command-line.qmd
command-line.rmarkdown
first-steps-git.qmd
git-essentials.qmd
github-advanced.qmd
gui.qmd
installation.qmd
intro-version-control.html
intro-version-control.qmd
issues.qmd
project-management.qmd
remotes-intro.qmd
rewriting-history.qmd
setup.qmd
tags-and-releases.qmdCommand-line commands can be extended using so-called flags and arguments. The difference between a flag and an argument is that a flag is used to modify the behavior of a command, while an argument provides additional input or information to the command.
A flag is typically a single character or a combination of characters preceded by a hyphen (-) or double hyphen (--). It is used to enable or disable specific options or features of a command. Flags are optional and are used to customize the behavior of the command. An example for a flag is the -a flag in the ls -a command that is used to list all files in a folder.
Code
ls -aAn argument is the actual input or information that is passed to a command to perform a specific action. It can be a value, a file name, a directory path, or any other data required by the command to complete its task. Arguments are often positioned after the command and any flags, and they can be mandatory or optional depending on the command’s requirements. An example for an argument is the path that is provided with the cd command to navigate to it.
Code
ls ~/DesktopYou can combine multiple single-letter flags by using a single dash. For example, to instruct the ls command to list all files (including hidden files) in a long format that is easy to read for humans, you can use the following combination of flags:
Code
ls -alhls -alh executed in the project directory of this guide.
total 380K
drwxr-xr-x 21 runner runner 4.0K Apr 16 22:07 .
drwxr-xr-x  3 runner runner 4.0K Apr 16 21:59 ..
-rw-r--r--  1 runner runner   36 Apr 16 21:59 .Renviron
-rw-r--r--  1 runner runner   48 Apr 16 21:59 .Rprofile
-rw-r--r--  1 runner runner 3.9K Apr 16 21:59 .all-contributorsrc
-rw-r--r--  1 runner runner   81 Apr 16 21:59 .codespellrc
drwxr-xr-x  7 runner runner 4.0K Apr 16 22:07 .git
drwxr-xr-x  3 runner runner 4.0K Apr 16 21:59 .github
-rw-r--r--  1 runner runner  193 Apr 16 21:59 .gitignore
drwxr-xr-x  7 runner runner 4.0K Apr 16 22:07 .quarto
-rw-r--r--  1 runner runner  925 Apr 16 21:59 .zenodo.json
-rw-r--r--  1 runner runner 1.2K Apr 16 21:59 CITATION.cff
-rw-r--r--  1 runner runner  20K Apr 16 21:59 LICENSE
-rw-r--r--  1 runner runner  728 Apr 16 21:59 Makefile
-rw-r--r--  1 runner runner  11K Apr 16 21:59 README.md
-rw-r--r--  1 runner runner  935 Apr 16 21:59 _affiliations.yml
-rw-r--r--  1 runner runner  861 Apr 16 21:59 _authors.yml
drwxr-xr-x  2 runner runner 4.0K Apr 16 22:07 _book
-rw-r--r--  1 runner runner 2.5K Apr 16 21:59 _courses.yml
drwxr-xr-x  3 runner runner 4.0K Apr 16 21:59 _extensions
-rw-r--r--  1 runner runner   97 Apr 16 21:59 _metadata.yml
-rw-r--r--  1 runner runner 3.5K Apr 16 21:59 _quarto.yml
-rw-r--r--  1 runner runner 3.1K Apr 16 21:59 _variables.yml
drwxr-xr-x  2 runner runner 4.0K Apr 16 22:07 chapters
-rw-r--r--  1 runner runner 6.7K Apr 16 21:59 cheatsheet.json
-rw-r--r--  1 runner runner  23K Apr 16 21:59 chicago-author-date-note.csl
drwxr-xr-x  3 runner runner 4.0K Apr 16 22:07 city-guide
drwxr-xr-x  2 runner runner 4.0K Apr 16 21:59 code
-rw-r--r--  1 runner runner  547 Apr 16 22:07 contents-listing.json
-rw-r--r--  1 runner runner  58K Apr 16 22:07 contents.html
-rw-r--r--  1 runner runner  636 Apr 16 21:59 contents.qmd
-rw-r--r--  1 runner runner  265 Apr 16 21:59 custom.scss
drwxr-xr-x  2 runner runner 4.0K Apr 16 21:59 exercises
drwxr-xr-x  2 runner runner 4.0K Apr 16 22:07 exercises-repos
drwxr-xr-x  2 runner runner 4.0K Apr 16 21:59 faq
-rw-r--r--  1 runner runner 2.4K Apr 16 21:59 functions.R
-rw-r--r--  1 runner runner  145 Apr 16 21:59 github-buttons.html
drwxr-xr-x  2 runner runner 4.0K Apr 16 22:07 images
-rw-r--r--  1 runner runner  47K Apr 16 22:07 index.html
-rw-r--r--  1 runner runner 6.2K Apr 16 21:59 index.qmd
drwxr-xr-x  2 runner runner 4.0K Apr 16 22:07 misc
drwxr-xr-x  2 runner runner 4.0K Apr 16 21:59 objectives
-rw-r--r--  1 runner runner  118 Apr 16 21:59 plausible.html
drwxr-xr-x  3 runner runner 4.0K Apr 16 22:07 recipes
-rw-r--r--  1 runner runner  13K Apr 16 21:59 references.bib
drwxr-xr-x  4 runner runner 4.0K Apr 16 22:00 renv
-rw-r--r--  1 runner runner  15K Apr 16 21:59 renv.lock
drwxr-xr-x  9 runner runner 4.0K Apr 16 22:07 site_libs
drwxr-xr-x  2 runner runner 4.0K Apr 16 21:59 static
drwxr-xr-x  2 runner runner 4.0K Apr 16 21:59 usecases
-rw-r--r-- 1 runner runner 211 Apr 16 21:59 version-control-book.RprojGetting help with commands can differ between operating systems. See the instructions for Windows and macOS below.
If you want to know what flags and arguments a command supports, most commands provide usage information when you use the flag --help. For example, you can use the ls command together with the --help flag:
Code
ls --helpThis will list all possible flags you can use together with the ls command.
On macOS you can’t use the --help flag. Instead you can use the man command, in combination with your desired command. This will display the manual page for a specified command. You can navigate through the manual pages using the arrow keys, and you can exit by pressing q. For example:
Code
man lsThe command line offers various commands for creating, moving, and deleting folders and files.
Let’s use the command line to create a new project folder. To make a new directory, we’ll use the mkdir command.
When creating new directories, consider their location carefully. If you are experimenting, consider deleting the newly created directories afterwards to avoid clutter.
The path of the directory we want to create is given as an argument to the command. If we want to create a directory in the current folder, we just need to use its name, as the path is assumed to be relative. For example, to create a new folder for your favorite recipes or a city guide, we can use the following command:
Code
mkdir recipesCode
mkdir city-guideMake sure that the new folder is present by using the ls command, and then move into it by using the cd command.
Code
cd recipesCode
cd city-guideFile exists
By default, you can’t overwrite existing directories and will receive a warning when run mkdir already exists. Try repeating the previous mkdir command. You will receive an error like this:
Output
mkdir: recipes: File existsNext, we will proceed to create multiple additional folders within the project folder. The mkdir command allows us to create multiple directories simultaneously by providing multiple arguments, each representing a separate folder. For example, we might create the following three folders:
Code
mkdir vegetarian vegan glutenfreeCode
mkdir food nature museumLet’s create some files in the project folder. To do this, you can use your favorite text editor or the command line. In the command line, you can use the touch command to create a new empty file. The file doesn’t need to contain anything. For example, to create an empty file, we can use the following command:
Code
touch recipes.txtCode
touch city-guide.txtTo open files, you can use your preferred text editor but also the command line. On the command line, you can use the start command on Windows (using Git Bash) or the open command on macOS. These commands will open the specified file in the default application associated with the file type.
Code
start recipes.txtCode
start city-guide.txtCode
open recipes.txtCode
open city-guide.txtThe echo command is a simple and versatile command used to display text or output it to files. It is commonly used in shell scripts and command-line operations to print messages, display variable values, or generate simple text files.
echoThe echo command outputs the text that follows it. For example, echo "Hello, World!" will display Hello, World! in the terminal.
Code
echo "Hello World"Output
Hello WorldIn this situation, you command line probably looks like one of these examples:
Output
echo "Hello World
>
>
>
Output
git commit -m "Add filename.txt
>
>
>
You can try one of the following solutions:
".echoYou can use echo to display the values of variables. For instance, echo $HOME will print the path of the home directory.
Code
echo $HOMEecho $HOME executed in the project directory of this guide.
/home/runnerechoTo include special characters or commands in the text output, use quotes around the text. For example, the following command will display the current date:
Code
echo "Current date: $(date)"Current date: Thu Apr 16 22:07:27 UTC 2026The echo command can also be used to write text to a file directly from the command line. By combining echo with the >> operator, you can add content to an existing file. For example, to add text to the text file using the command line run the following command:
Code
echo "This is a list of all my favorite recipes." >> recipes.txt Code
echo "This is a list of all my favorite places." >> city-guide.txtThis adds the provided text to the existing content of the text file.
>> or > with echo when writing short text into files
When you use the command echo "Git is cool" >> file.txt, it will append the text “Git is cool” to the end of the file file.txt. If the file does not exist, it will be created and the text “Git is cool” will be added. If the file already contains other text, the “Git is cool” text will be added after the existing text at the end of the file.
On the other hand, when you use the command echo "Git is cool" > file.txt, it will write the text “Git is cool” to a file named file.txt. If the file already exists, it will overwrite its contents with the new text “Git is cool”.
If you want to quickly view the content of a file without opening it, you can do so in the command line using the cat command. To display the content of a file, simply use cat followed by the file name. For example:
Code
cat recipes.txtCode
cat city-guide.txtThis command will output the entire content of the text file to the terminal.
cat command applied to the .gitignore file in the project directory of this guide.
/.quarto/
/_book/
.Rproj.user
/env/
.Rhistory
images
/.luarc.json
.DS_Store
*.html
*.ipynb
/exercises-repos/
/recipes/
/city-guide/
*.html.md
site_libs/
contents-listing.json
.ipynb_checkpointsLet’s say we want to move the text file to another subfolder. We can use the mv command to move files and folders. The mv command requires two arguments: the first is the files or folders to be moved, and the second is the path where they should be moved. To move the text file to the subfolder, the command would look like this:
Code
mv recipes.txt veganCode
mv city-guide.txt foodSuppose we don’t like the subfolders names because the text file actually contains content is more relevant for another subfolder. We can use the mv command to rename files and folders by moving them to a different location in the file system like this:
Code
mv vegan meatCode
mv food attractionsNote that you can’t be inside a folder when renaming it (your current working directory is the folder that you want to rename) but you have to be in its parent directory. Let’s say that you try to rename the subfolder but you are inside the folder (check with pwd), you will receive an error like this:
Output
vegan$ mv vegan meat
mv: rename vegan to meat: No such file or directory
Output
food$ mv food attractions
mv: rename food to attractions: No such file or directoryLet’s assume that you moved the text file to the subfolder, as shown above. Now let’s move the text file back to the parent folder. To do this, you can first cd into the subfolder and then use the .. shortcut (for details on .., see the section above) in combination with the mv command:
Code
cd meat
mv recipes.txt ..
Code
cd attractions
mv city-guide.txt ..There are various ways how you can download files from the internet using the command line. Here, we present two simple approaches using the tools curl and wget. Note, that wget is not natively installed on Windows. They are both powerful tools used to download files from the web directly through the command line. This is particularly useful for retrieving files from a remote server or downloading large datasets.
To download a file into your current directory, simply use the following syntax:
For example, if you want to download the logo of this project, you could use the following command:
Code
curl -O https://lennartwittkuhn.com/version-control-book/images/logo.svgCode
wget https://lennartwittkuhn.com/version-control-book/images/logo.svgThis command will download logo.svg from the specified URL and save it in the current working directory.
Now let’s learn how to use so-called wildcards to perform actions on multiple files or folders at the same time. A wildcard is denoted by the symbol *, and it helps us select file system arguments that match certain patterns. For example, suppose we wish to display a list of all files of a certain file type (here, all files with the .yml file extension) in the current directory:
Code
ls -alh *.ymlls -alh *.yml command executed in the project directory of this guide.
-rw-r--r-- 1 runner runner  935 Apr 16 21:59 _affiliations.yml
-rw-r--r-- 1 runner runner  861 Apr 16 21:59 _authors.yml
-rw-r--r-- 1 runner runner 2.5K Apr 16 21:59 _courses.yml
-rw-r--r-- 1 runner runner   97 Apr 16 21:59 _metadata.yml
-rw-r--r-- 1 runner runner 3.5K Apr 16 21:59 _quarto.yml
-rw-r--r-- 1 runner runner 3.1K Apr 16 21:59 _variables.ymlThe first column (-rw-r--r--) represents the file permissions. In Unix-like systems, it shows who can read, write, or execute the file. In this case, the files are readable and writable by the owner (rw-), readable by the group (r--), and readable by others (r--).
The second column (1) indicates the number of hard links to the file.
The third column (runner) is the username of the file’s owner. Here, the username is runner because the this online guide is build automatically on GitHub using GitHub Actions and runner refers to the computing environment where the build process is executed. If you would build the book on your computer, it would show your username.
The fourth column (docker) is the group associated with the file. Here, the group name is docker which again refers to the computing environment where this online guide is built.
The fifth column shows the size of the file. In this case there are just small textfiles included with the sizes ranging from 97B to 3.0K.
The next column (for example, Jan 18 20:39) display the date and time when the file was last modified.
The last column (for example, _affiliations.yml etc.) shows the name of each file.
By using the wildcard *, we can generate a list of all files ending with .yml. Similarly, we can apply the wildcard at the end of a path to match items starting with a specific letter, such as folders beginning with i:
Code
ls -alh i*ls -alh i* executed in the project directory of this guide.
-rw-r--r-- 1 runner runner  47K Apr 16 22:07 index.html
-rw-r--r-- 1 runner runner 6.2K Apr 16 21:59 index.qmd

images:
total 49M
drwxr-xr-x  2 runner runner 4.0K Apr 16 22:07 .
drwxr-xr-x 21 runner runner 4.0K Apr 16 22:07 ..
-rw-r--r--  1 runner runner 1.5M Aug 19  2024 allisonhorst-commits-qoute.png
-rw-r--r--  1 runner runner 878K Aug 19  2024 allisonhorst-commits.png
-rw-r--r--  1 runner runner 1.2M Aug 19  2024 allisonhorst-gitfetch.png
-rw-r--r--  1 runner runner 2.1M Aug 19  2024 allisonhorst-github-qoute.png
-rw-r--r--  1 runner runner 207K Aug 19  2024 allisonhorst-mergeconflict.png
-rw-r--r--  1 runner runner 2.0M Aug 19  2024 allisonhorst-project-management.png
-rw-r--r--  1 runner runner 1.7M Aug 19  2024 allisonhorst-remotes-branches.png
-rw-r--r--  1 runner runner 3.1M Aug 19  2024 allisonhorst-remotes.png
-rw-r--r--  1 runner runner 124K Feb 26  2024 blank-issue-link.png
-rw-r--r--  1 runner runner  15K Feb 26  2024 branches.png
-rw-r--r--  1 runner runner 7.8K Jul 13  2023 branches.svg
-rw-r--r--  1 runner runner 112K Nov 27  2023 brancheschapter.png
-rw-r--r--  1 runner runner 8.7K Sep 28  2023 cherry-pick.png
-rw-r--r--  1 runner runner 1.3M Aug 19  2024 cli_jupyter.png
-rw-r--r--  1 runner runner 203K Oct 23  2023 cli_jupyter_2.png
-rw-r--r--  1 runner runner 203K Oct 23  2023 cli_jupyter_2_old.png
-rw-r--r--  1 runner runner 317K Oct 23  2023 cli_jupyter_old.png
-rw-r--r--  1 runner runner  36K Oct 23  2023 cli_meme.jpg
-rw-r--r--  1 runner runner 9.8K Jul 11  2024 command-line-bash.png
-rw-r--r--  1 runner runner 150K Oct 26  2023 definitely-not-lazy-commit-strip.gif
-rw-r--r--  1 runner runner  404 Mar  6  2024 equals-solid.svg
-rw-r--r--  1 runner runner 1.3K Mar  6  2024 gear-solid.svg
-rw-r--r--  1 runner runner 7.2K Jul 11  2024 git-for-windows-logo.png
-rw-r--r--  1 runner runner 2.4K Feb 26  2024 git-icon.png
-rw-r--r--  1 runner runner  841 Jun 16  2023 git-icon.svg
-rw-r--r--  1 runner runner  46K Mar 25  2024 git-in-case-of-fire.png
-rw-r--r--  1 runner runner 9.8K Mar 25  2024 git-in-case-of-fire.svg
-rw-r--r--  1 runner runner 5.9K Feb 26  2024 git-logo-full-color.png
-rw-r--r--  1 runner runner 2.7K Jul 19  2023 git-logo-full-color.svg
-rw-r--r--  1 runner runner 2.4K Mar  1  2024 git-logo.png
-rw-r--r--  1 runner runner  37K Oct 25  2023 git_bash_inst_1.png
-rw-r--r--  1 runner runner  42K Oct 25  2023 git_bash_inst_10.png
-rw-r--r--  1 runner runner  32K Oct 25  2023 git_bash_inst_11.png
-rw-r--r--  1 runner runner  25K Oct 25  2023 git_bash_inst_12.png
-rw-r--r--  1 runner runner  32K Oct 25  2023 git_bash_inst_13.png
-rw-r--r--  1 runner runner  20K Oct 25  2023 git_bash_inst_14.png
-rw-r--r--  1 runner runner  24K Oct 25  2023 git_bash_inst_15.png
-rw-r--r--  1 runner runner  26K Oct 25  2023 git_bash_inst_2.png
-rw-r--r--  1 runner runner  39K Oct 25  2023 git_bash_inst_3.png
-rw-r--r--  1 runner runner  25K Oct 25  2023 git_bash_inst_4.png
-rw-r--r--  1 runner runner  35K Oct 25  2023 git_bash_inst_5.png
-rw-r--r--  1 runner runner  35K Oct 25  2023 git_bash_inst_6.png
-rw-r--r--  1 runner runner  44K Oct 25  2023 git_bash_inst_7.png
-rw-r--r--  1 runner runner  27K Oct 25  2023 git_bash_inst_8.png
-rw-r--r--  1 runner runner  44K Oct 25  2023 git_bash_inst_9.png
-rw-r--r--  1 runner runner 309K Oct 25  2023 git_bash_website.png
-rw-r--r--  1 runner runner  16K Oct 25  2023 git_bash_window.png
-rw-r--r--  1 runner runner 206K Jul  9  2024 git_internals_objects.png
-rw-r--r--  1 runner runner 424K Aug 17  2023 github-desktop-gettingstarted.png
-rw-r--r--  1 runner runner 682K Aug 11  2023 github-desktop-window.png
-rw-r--r--  1 runner runner  21K Jan 18  2024 github-edit-release-pencil.png
-rw-r--r--  1 runner runner 1.5M Aug 17  2023 github-forking.png
-rw-r--r--  1 runner runner  31K Sep 13  2024 github-https-url-clone-cli.png
-rw-r--r--  1 runner runner 6.3K Dec  1  2022 github-logo.png
-rw-r--r--  1 runner runner  963 Nov  3  2021 github-logo.svg
-rw-r--r--  1 runner runner 255K Mar 25  2024 github-newrepository.png
-rw-r--r--  1 runner runner 281K Mar 25  2024 github-pat.png
-rw-r--r--  1 runner runner 198K Jan 16  2025 github-releases.png
-rw-r--r--  1 runner runner 109K Feb 14  2025 github-template-settings.png
-rw-r--r--  1 runner runner 1.3M Aug 17  2023 github-template.png
-rw-r--r--  1 runner runner  18K Nov 27  2023 githubchapter.png
-rw-r--r--  1 runner runner 859K Aug 17  2023 gitkraken-gettingstarted.png
-rw-r--r--  1 runner runner 789K Aug 17  2023 gitkraken-mergeconflict.png
-rw-r--r--  1 runner runner 751K Aug 17  2023 gitkraken-staging.png
-rw-r--r--  1 runner runner 971K Aug 17  2023 gitkraken-window.png
-rw-r--r--  1 runner runner  30K Jul  1  2024 gitlab-logo.jpg
-rw-r--r--  1 runner runner 1.1M Jul  2  2024 gitlab_fork.png
-rw-r--r--  1 runner runner 1.2M Jul  2  2024 gitlab_repo_settings.png
-rw-r--r--  1 runner runner 1.2M Jul  2  2024 gitlab_template.png
-rw-r--r--  1 runner runner 273K Feb 26  2024 issue-assignees.png
-rw-r--r--  1 runner runner  66K Feb 26  2024 issue-comment.png
-rw-r--r--  1 runner runner 293K Feb 26  2024 issue-milestone.png
-rw-r--r--  1 runner runner 288K Feb 26  2024 issue-project.png
-rw-r--r--  1 runner runner 353K Feb 26  2024 issue-task-list-raw.png
-rw-r--r--  1 runner runner 308K Feb 26  2024 issue-title-body.png
-rw-r--r--  1 runner runner 280K Feb 26  2024 issue-with-label.png
-rw-r--r--  1 runner runner  93K Feb 21  2025 issue_board.png
-rw-r--r--  1 runner runner  11K Feb 28  2024 logo.png
-rw-r--r--  1 runner runner 1.6K Feb 27  2024 logo.svg
-rw-r--r--  1 runner runner 430K Aug 19  2024 mac-dock.png
-rw-r--r--  1 runner runner 941K Oct 18  2024 mainframe-computer.jpg
-rw-r--r--  1 runner runner 179K Dec  5  2023 merge-conflict-headache.png
-rw-r--r--  1 runner runner  59K Mar 20  2024 merging.png
-rw-r--r--  1 runner runner  731 Mar  6  2024 pen-to-square-solid.svg
-rw-r--r--  1 runner runner 111K Jul 19  2023 phd-comic-final-doc.gif
-rw-r--r--  1 runner runner  82K Feb 26  2024 phd-comic-final-doc.png
-rw-r--r--  1 runner runner  74K Sep  7  2023 phd-comic-story-told-in-file-names.gif
-rw-r--r--  1 runner runner  50K Feb 26  2024 phd-comic-story-told-in-file-names.png
-rw-r--r--  1 runner runner  412 Mar  6  2024 plus-solid.svg
-rw-r--r--  1 runner runner 487K Apr  2  2024 pr_screenshot.png
-rw-r--r--  1 runner runner 1.5M Feb 26  2024 project-history-turing-way.png
-rw-r--r--  1 runner runner 385K Mar  3  2020 project-history-turing-way.svg
-rw-r--r--  1 runner runner 1.9M Feb 26  2024 provenance-turing-way.png
-rw-r--r--  1 runner runner 543K Mar  3  2020 provenance-turing-way.svg
-rw-r--r--  1 runner runner  14K Sep 28  2023 rebasing.jpg
-rw-r--r--  1 runner runner 102K Feb 26  2024 repo-tabs-issues.png
-rw-r--r--  1 runner runner  73K Mar 17 21:43 rstudio-commit-tab.png
-rw-r--r--  1 runner runner 257K Mar 17 21:40 rstudio-commit.png
-rw-r--r--  1 runner runner 158K Mar 17 20:00 rstudio-create-new-project.png
-rw-r--r--  1 runner runner  52K Mar 17 20:01 rstudio-git-files.png
-rw-r--r--  1 runner runner 544K Mar 17 21:28 rstudio-git-tab.png
-rw-r--r--  1 runner runner  51K Aug 17  2023 rstudio-gitpanel.png
-rw-r--r--  1 runner runner 132K Mar 17 19:57 rstudio-new-directory.png
-rw-r--r--  1 runner runner  93K Mar 17 19:58 rstudio-new-project.png
-rw-r--r--  1 runner runner 986K Aug 17  2023 rstudio-newproject.png
-rw-r--r--  1 runner runner 1.2M Aug 17  2023 rstudio-panels.png
-rw-r--r--  1 runner runner  79K Mar 17 21:42 rstudio-staging.png
-rw-r--r--  1 runner runner 697K Sep 10  2024 rstudio_committing.png
-rw-r--r--  1 runner runner 949K Sep 10  2024 rstudio_log.png
-rw-r--r--  1 runner runner 1.3M Sep 17  2024 rstudio_newbranch.png
-rw-r--r--  1 runner runner 1.3M Sep 17  2024 rstudio_switchbranch.png
-rw-r--r--  1 runner runner 354K Aug 19  2024 solo-project-meme.png
-rw-r--r--  1 runner runner  32K Dec  4  2024 ssh-key-public-private.png
-rw-r--r--  1 runner runner 791K Oct 18  2024 terminal-computer.jpg
-rw-r--r--  1 runner runner  71K Apr 27  2024 terminal-icon.png
-rw-r--r--  1 runner runner 127K May  3  2024 turing-way-branches.png
-rw-r--r--  1 runner runner  11K Mar  1  2024 uhh-logo.png
-rw-r--r--  1 runner runner 1.7M Feb 26  2024 version-control-turing-way.png
-rw-r--r--  1 runner runner 693K Mar  3  2020 version-control-turing-way.svg
-rw-r--r--  1 runner runner  16K Jul  2  2023 versions-single-file.png
-rw-r--r--  1 runner runner 752K Feb 20  2024 welcome.jpg
-rw-r--r--  1 runner runner  79K Aug  4  2023 xkcd-chat-systems.png
-rw-r--r--  1 runner runner  26K Jul 19  2023 xkcd-documents.png
-rw-r--r-- 1 runner runner 53K Mar 6 2024 xkcd-git-commit.pngTo delete files and folders, you can use the rm command. Provide the path of the files or folders that you want to delete as the argument. However, if you want to remove a folder, you need to include the -r (or --recursive) flag.
rm command!
When you use the rm command to delete files, they are removed entirely (!!!) from your system and cannot be retrieved from a “Recycle Bin” or “Trash” as when you delete files using the file browser!
For example, to remove a specific folder, you would use the following command:
Code
rm -r glutenfreeCode
rm -r museumCombining commands in the command-line using semicolons ; is a way to execute multiple commands sequentially on a single line. Each command is separated by a semicolon, and they are executed one after the other, regardless of the success or failure of the previous command.
For example, let’s say you want to (1) create a new directory, (2) move into that directory, and then (3) list the files in that directory, all in one go. You can use semicolons to combine these commands like this:
Code
mkdir new_directory ; cd new_directory ; lsThis will (1) create a new directory called new_directory, (2) change the current working directory to new_directory and (3) list the files in this new directory.
In this lesson, we have achieved the following:
~, . and ...It’s important to note that what we covered here only scratches the surface of what can be accomplished using the shell. The primary aim was to provide useful concepts that help when learning Git. If you’re interested in delving deeper, you may find a more comprehensive introduction at one of the following resources.

We would like to express our gratitude to the following resources, which have been essential in shaping this chapter. We recommend these references for further reading:
| Authors | Title | Website | License | Source |
|---|---|---|---|---|
| Millman et al. (2018) | Teaching Computational Reproducibility for Neuroimaging | CC BY 4.0. Website: | ||
| Milligan and Baker (2014) | Introduction to the Bash Command Line | NA | NA | NA |
| McBain (2019) | Git for Scientists | CC BY-SA 4.0 | ||
| Capes et al. (2023) | swcarpentry/shell-novice: Software Carpentry: the UNIX shell | CC BY 4.0 |
| Command | Description |
|---|---|
pwd |
Displays the path of the current working directory |
cd <PATH> |
Changes the current working directory to <PATH> |
cd ~ |
Changes the current working directory to the user’s home directory |
cd .. |
Moves up one folder |
cd ../.. |
Moves up two folders |
clear |
Clears the contents of your command line window |
ls |
Lists files and folders in the current working directory |
ls <PATH> |
Lists files and folders in <PATH> |
ls -a |
Lists all files (including hidden files) in the current working directory |
ls -alh |
Lists all files in a long format that is easy to read for humans |
[Command] --help |
Displays all possible flags for a specific command (on Windows) |
man [Command] |
Displays all possible flags for a specific command (on macOS) |
mkdir <FOLDER> |
Creates a new folder called <FOLDER> |
mkdir <FOLDER1> <FOLDER2> |
Creates two separate folders called <FOLDER1> and <FOLDER2> |
touch <FILE> |
Creates a new empty file called <FILE> |
open <FILE> |
Opens the file called <FILE> (on macOS) |
start <FILE> |
Opens the file called <FILE> (on Windows) |
echo "example text" >> file.txt |
Writes “example text” into file.txt |
cat <FILE> |
Displays the content of <FILE> |
mv FILE.txt <FOLDER> |
Move FILE.txt into <FOLDER> |
mv <FOLDER_OLD> <FOLDER_NEW> |
Renames <FOLDER_OLD> to <FOLDER_NEW> |
ls -alh *.csv |
Uses a wildcard to list all .csv files in the current working directory |
rm -r <FOLDER> |
Removes the folder <FOLDER> |
history |
Display the command history of the current terminal session |
history > history.txt |
Saves the entire command history to a file named history.txt (overwrites existing content in history.txt) |
history >> history.txt |
Adds the entire command history to the end of the file named history.txt |
tree |
Displays a graphical representation of the directory structure |
wget <URL> |
Downloads a file from the specified |