


Code
git blame recipes.txtIn this chapter, we will explore more advanced features of GitHub, including forking, pull requests and workflows for collaboration with Git and GitHub.
Many research tools, data analysis pipelines, and statistical libraries are developed and maintained in open-source repositories on platforms like GitHub. Learning to fork repositories and submit pull requests enables researchers to contribute improvements, bug fixes, or new features to widely used tools. For example, a researcher working with a statistical package in R can fork the repository, make improvements or fix bugs, and submit a pull request to help the research community.
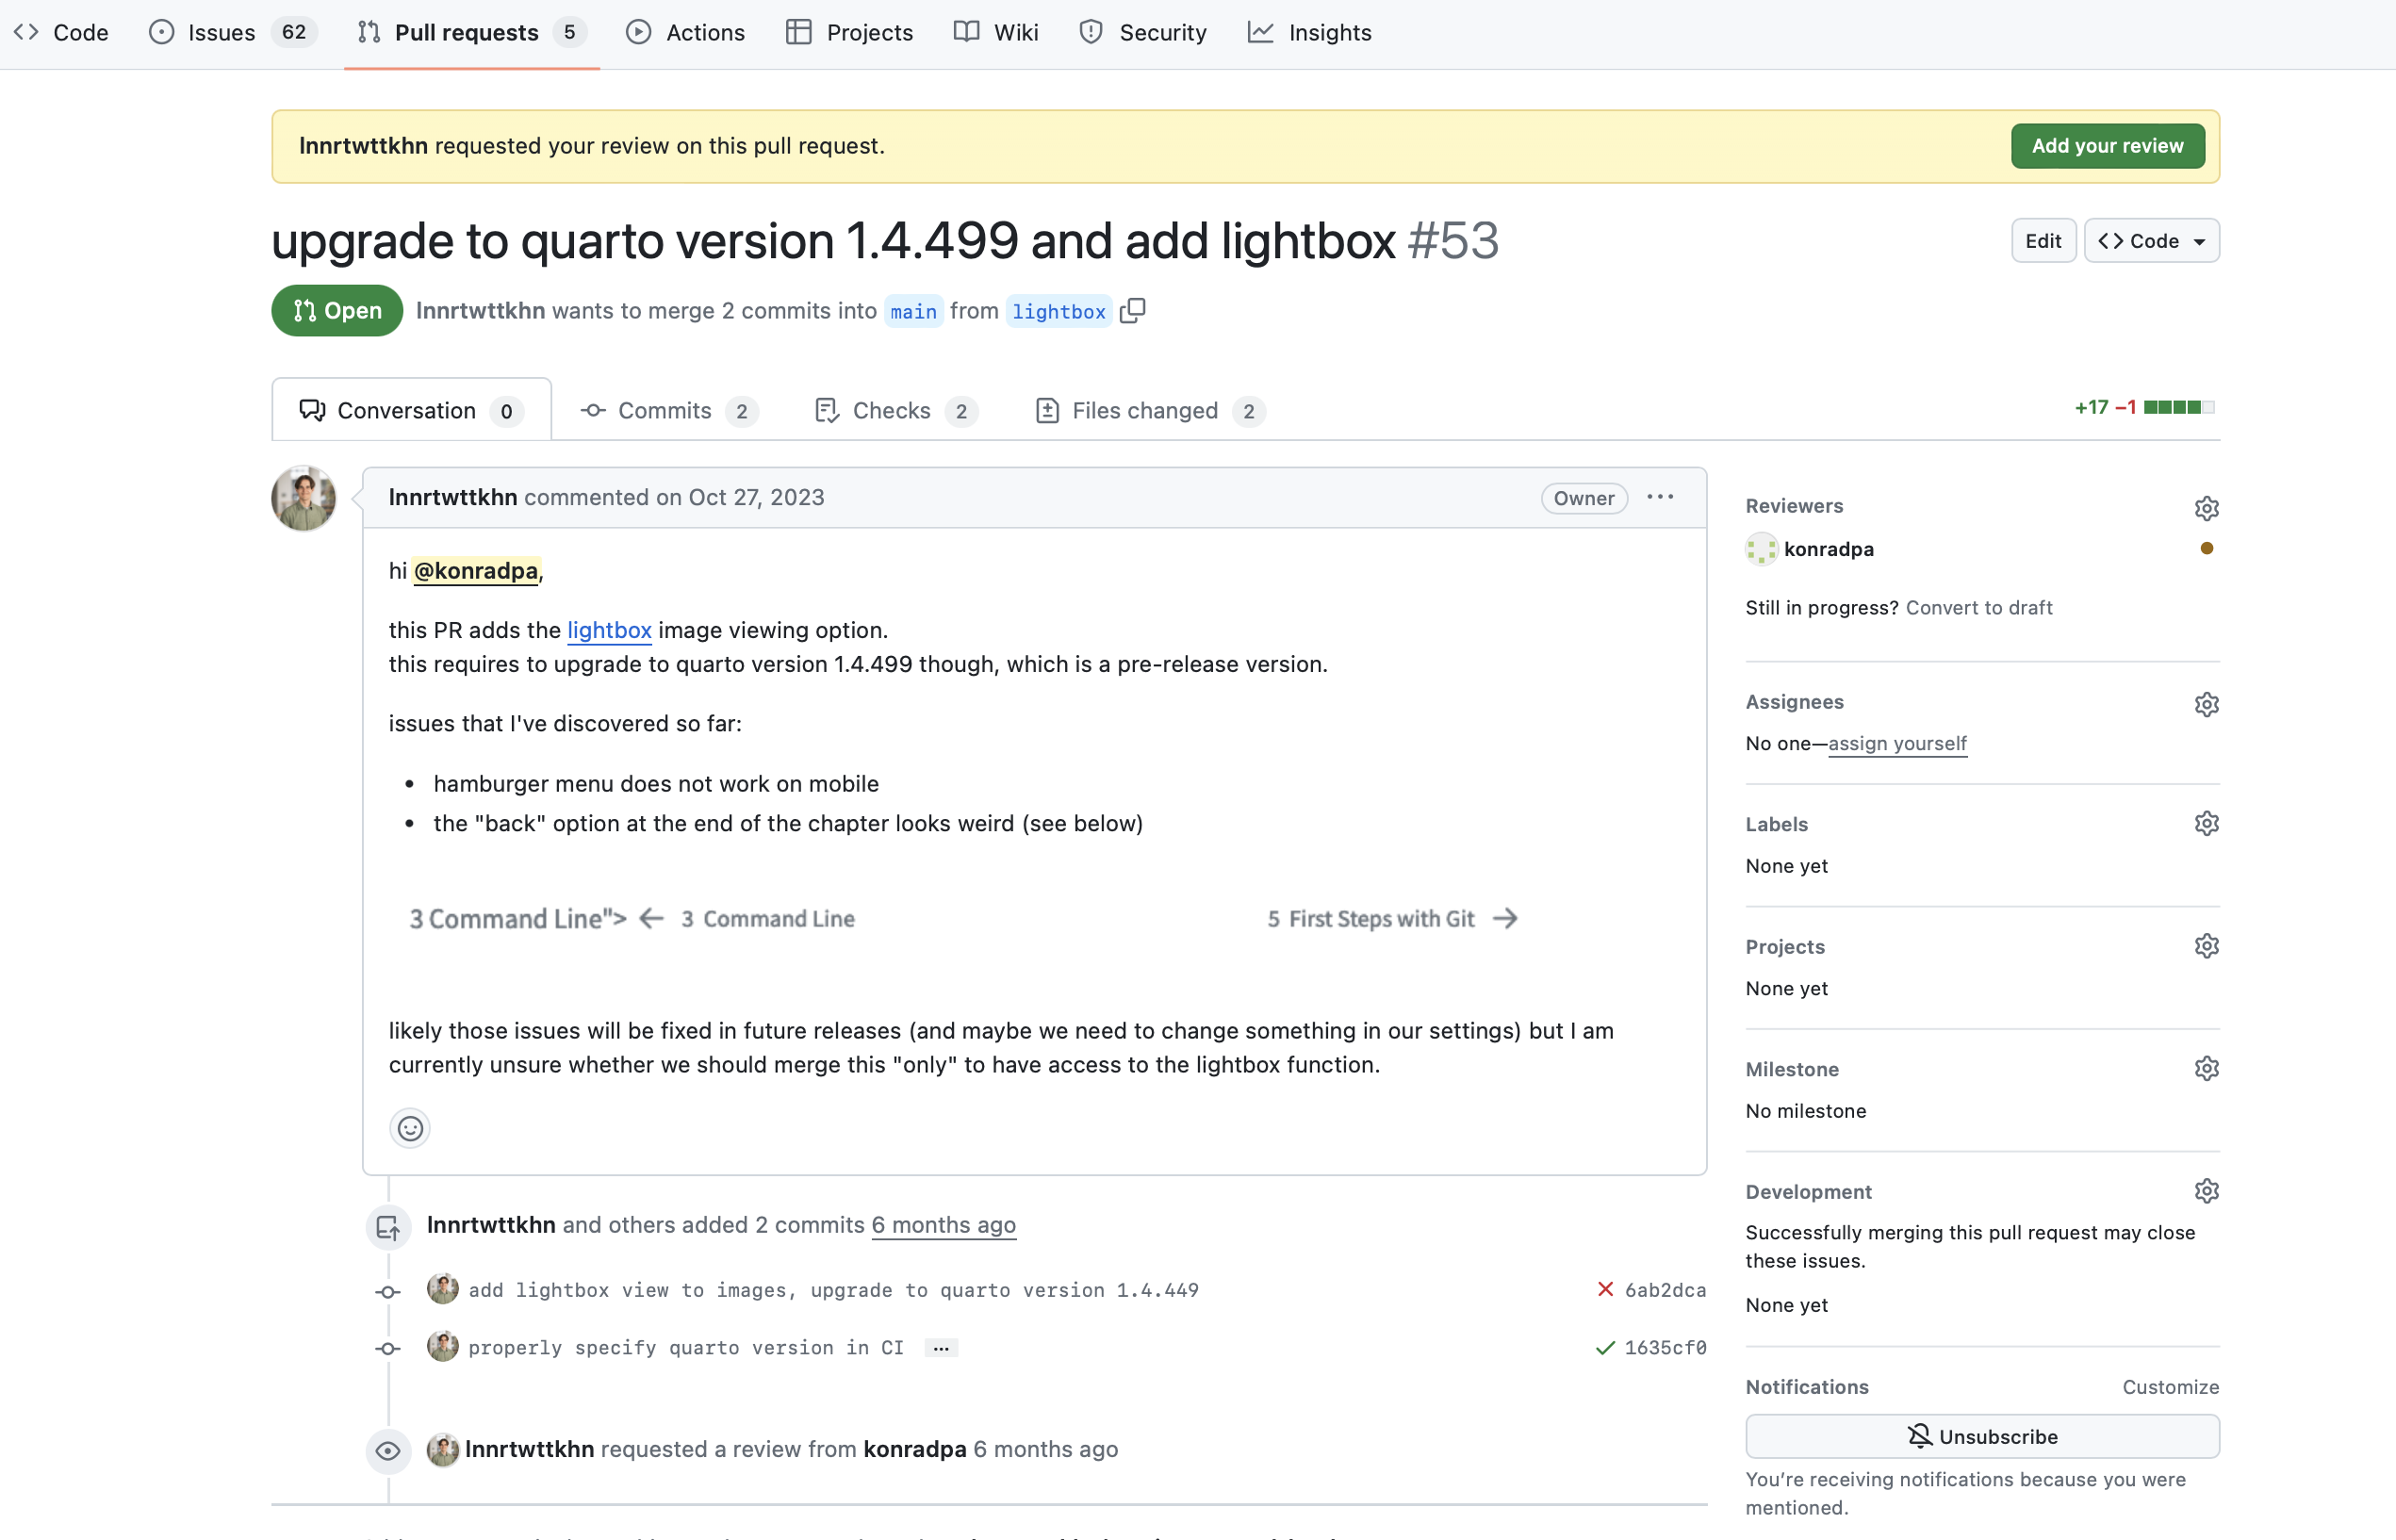
A pull request (PR) serves as a request for code review and integration into a project’s codebase, enabling collaboration and ensuring code quality before changes are merged. Basically, it’s a way to propose a merge from a branch. Often it’s used to merge changes from a feature branch into the main branch of the repository.
When dealing with pull requests, there are two main workflows: (1) a pull request from a forked repository, (2) a pull request from a branch within a repository. Here’s a breakdown of the components of a pull request:
In addition, to these basic components, the pull request interface provides sections for reviewers, assignees, labels, and milestones on the right-hand side (see Figure 10.1).
In this scenario, contributors work directly within the original repository, creating a new branch for their changes. After completing the changes in the branch, they create a pull request from that branch to the main repository’s default branch (typically main or master). The workflow for this is the same as for opening a pull request for a forked repository. You can see an example pull request within a repository in Figure 10.1.
When using Git collaboratively, several workflow strategies or “flows” have been developed to manage the development process efficiently. GitHub Flow is popular because it’s simple and it makes sure everyone’s contributions are reviewed and integrated smoothly.
Create a branch: This step involves branching off from the main project (usually from the main or master branch). The branch should be named descriptively to reflect the work that will be done within it. For details, see the previous chapter on branches.
Make changes: After creating your branch, you can start working on your project within this new branch. This involves making changes, adding new features, or fixing bugs. It’s recommended to commit your changes regularly with clear and concise commit messages.
Open a pull request: Once you have made enough progress on your branch or completed the work, you can open a pull request (PR), as outlined above. This is a way to notify your team that your changes are ready to be reviewed. A PR allows your teammates to see the changes you’ve made and provides a platform for discussing the proposed modifications.
Discuss and review your changes: Once you’ve opened a PR, your team will go over your updates, share their thoughts, and recommend any adjustments. This review process is crucial for ensuring the code’s robustness, efficiency, and adherence to the project’s guidelines.
Merge the branch: After you have been reviewed and your changes validated, your branch needs to be merged back into the main branch. Your work becomes part of the main codebase, and everyone can see the contribution you’ve made.
Pull changes: Finally, everyone updates their own versions of the project with the latest changes from the main branch. This ensures that everyone is working with the most current version, including the changes you’ve just added.
Delete branch: Once your branch has been successfully merged, it’s time to clean up. Delete the feature branch to maintain a tidy project structure.
README fileA README is a text file that provides basic information about a project. As mentioned earlier, the README file can be created together with your repository or can be added later. In the context of a Git repository, the README file should contain “a description of your repository”. The exact content depends on your repository, but some general things that you might want to include are:
Project description: What function does this repository serve and what are it’s key features?
Installation instructions (if applicable): Explain how to install and set up your project, including any dependencies or prerequisites. This is particularly relevant for repositories that contain programming code. Provide clear instructions to help users or contributors get started with your project quickly.
Usage (if applicable): Provide examples or code snippets demonstrating how to use your project.
Contributing: If you welcome contributions, specify how others can contribute to your project. Here, you can also include guidelines for submitting bug reports, feature requests, or pull requests.
CONTRIBUTING.md file to a repository
For larger or more complex projects where contributions may involve setting up a specific development environment or adhering to specific workflows, it is standard practice to create a file called CONTRIBUTING.md. GitHub recognizes the presence of a CONTRIBUTING.md file in a repository and, for example, automatically includes a link to the CONTRIBUTING.md file when users open a new issue or pull request.
Acknowledgments: Give credit to any third-party libraries, tools, or individuals that contributed to your project.
License: Choose a license that aligns with your project’s goals. You can use choosealicense.com for guidance. The chosen license influences contributions to your project.
README.md file of this project.
![]()
![]()
![]()

![]()
Welcome to the Version Control Book, a resource initially created in the context of a course on version control at Universität Hamburg in 2023/2024.
The Version Control Book aims to summarize all the relevant course contents for the students, effectively serving as a textbook for this course. The book also aims to serve as an open-source learning resource for everyone, with a particular emphasis on providing guidance for researchers learning version control using Git and GitHub. This is a living resource on why and - more importantly - how to use Git. The rendered version is at https://lennartwittkuhn.com/version-control-book/ and is under constant development.
Contributions in any form - pull requests, issues, content requests, ideas, etc. - are always welcome. If you are using the book and find that something does not work, please let us know. You can find out more on how to contribute here, and a list of all contributors so far below. Before contributing, please read the guidelines for contributions on how to get involved. To maintain consistency and readability, we follow a style guide. Please refer to the Style Guide for details on formatting, coding standards, and other conventions. We appreciate your contributions and look forward to building a comprehensive and valuable resource on version control!
To render and preview, execute:
quarto previewYou are free to
under the following terms:
Attribution — You must give appropriate credit, provide a link to the license, and indicate if changes were made. You may do so in any reasonable manner, but not in any way that suggests the licensor endorses you or your use.
ShareAlike — If you remix, transform, or build upon the material, you must distribute your contributions under the same license as the original.
A README is typically a Markdown (.md) file, which means you can use Markdown syntax in it. Markdown allows you to easily format text, create lists, include links, and embed images.
In the previous chapter, you learned that you can invite other people as collaborators to your repository. However, this usually comes with a few privileges in administering your project that you might not want to share with any random person who would like to contribute to your project. At the same, a central idea of open-source development is that even people who don’t know each other can collaborate together on open-source code. This is where forking comes in: Forking a repository on GitHub allows you to create a personal copy of someone else’s project under your GitHub account and contributing to that project without direct access to the original repository.
This copy of the repository includes all files, commit history, and branches and also keeps a reference to the repository it was copied from. Forking is commonly used when you want to contribute to a project but you don’t have direct access to the original repository. It enables you to make changes independently, create new branches, and push modifications to your forked repository. You can also submit changes to the original repository through so-called pull requests which will be explained in more detail below.
By clicking the Fork button on a repository page, as shown in Figure 11.1, you create an identical copy of the repository in your GitHub account.
Once the forking process is complete, you can clone the repository to your local machine using the git clone command (for more details on git clone, see the previous chapter).
While it is not strictly necessary to create a new branch after forking a repository, it is considered a best practice for most workflows, particularly when contributing to a project. By default, your fork will create a copy of the original repository’s default branch (usually main), and you can make changes directly on this branch. However, doing so without creating a new branch to work on can complicate the process of keeping your fork up to date with the original project and managing contributions.
To create a pull request after forking a repository and making changes, follow these steps:
Navigate to your forked repository on GitHub. Make sure you are on the branch that contains the changes you want to propose.
Click on “Contribute” and then “Open Pull Request”.
In the pull request interface, choose the branch you made changes to in your fork (the “compare” branch) and the original repository’s branch where you want to propose your changes (the “base” branch).
Review the changes.
Click on the “Create Pull Request” button. Give your pull request a meaningful title and provide a description explaining the changes you made.
Submit the Pull Request.
The owner of the original repository can now approve the changes and thereby merge your repository’s branch into his.
The command git blame is useful when you are working on a project with multiple collaborators. It it used to show when and by whom, each line in a specific file was last changed. You have to specify a file when using it, for example:
Code
git blame recipes.txtIf you are working solo on a text file, the result should not be very interesting. However, if you collaborate on code, this command can be very useful (for blame or praise!)
git blame flags
-L <start>,<end>: Specifies a line range to blame. For example, git blame -L 10,20 file.txt will blame lines 10 to 20 of the file.
-M: Detects lines that were moved within the file and shows the original author’s information.
-e: Shows the author’s email address in addition to their name.
-t: Shows the commit timestamp for each line.
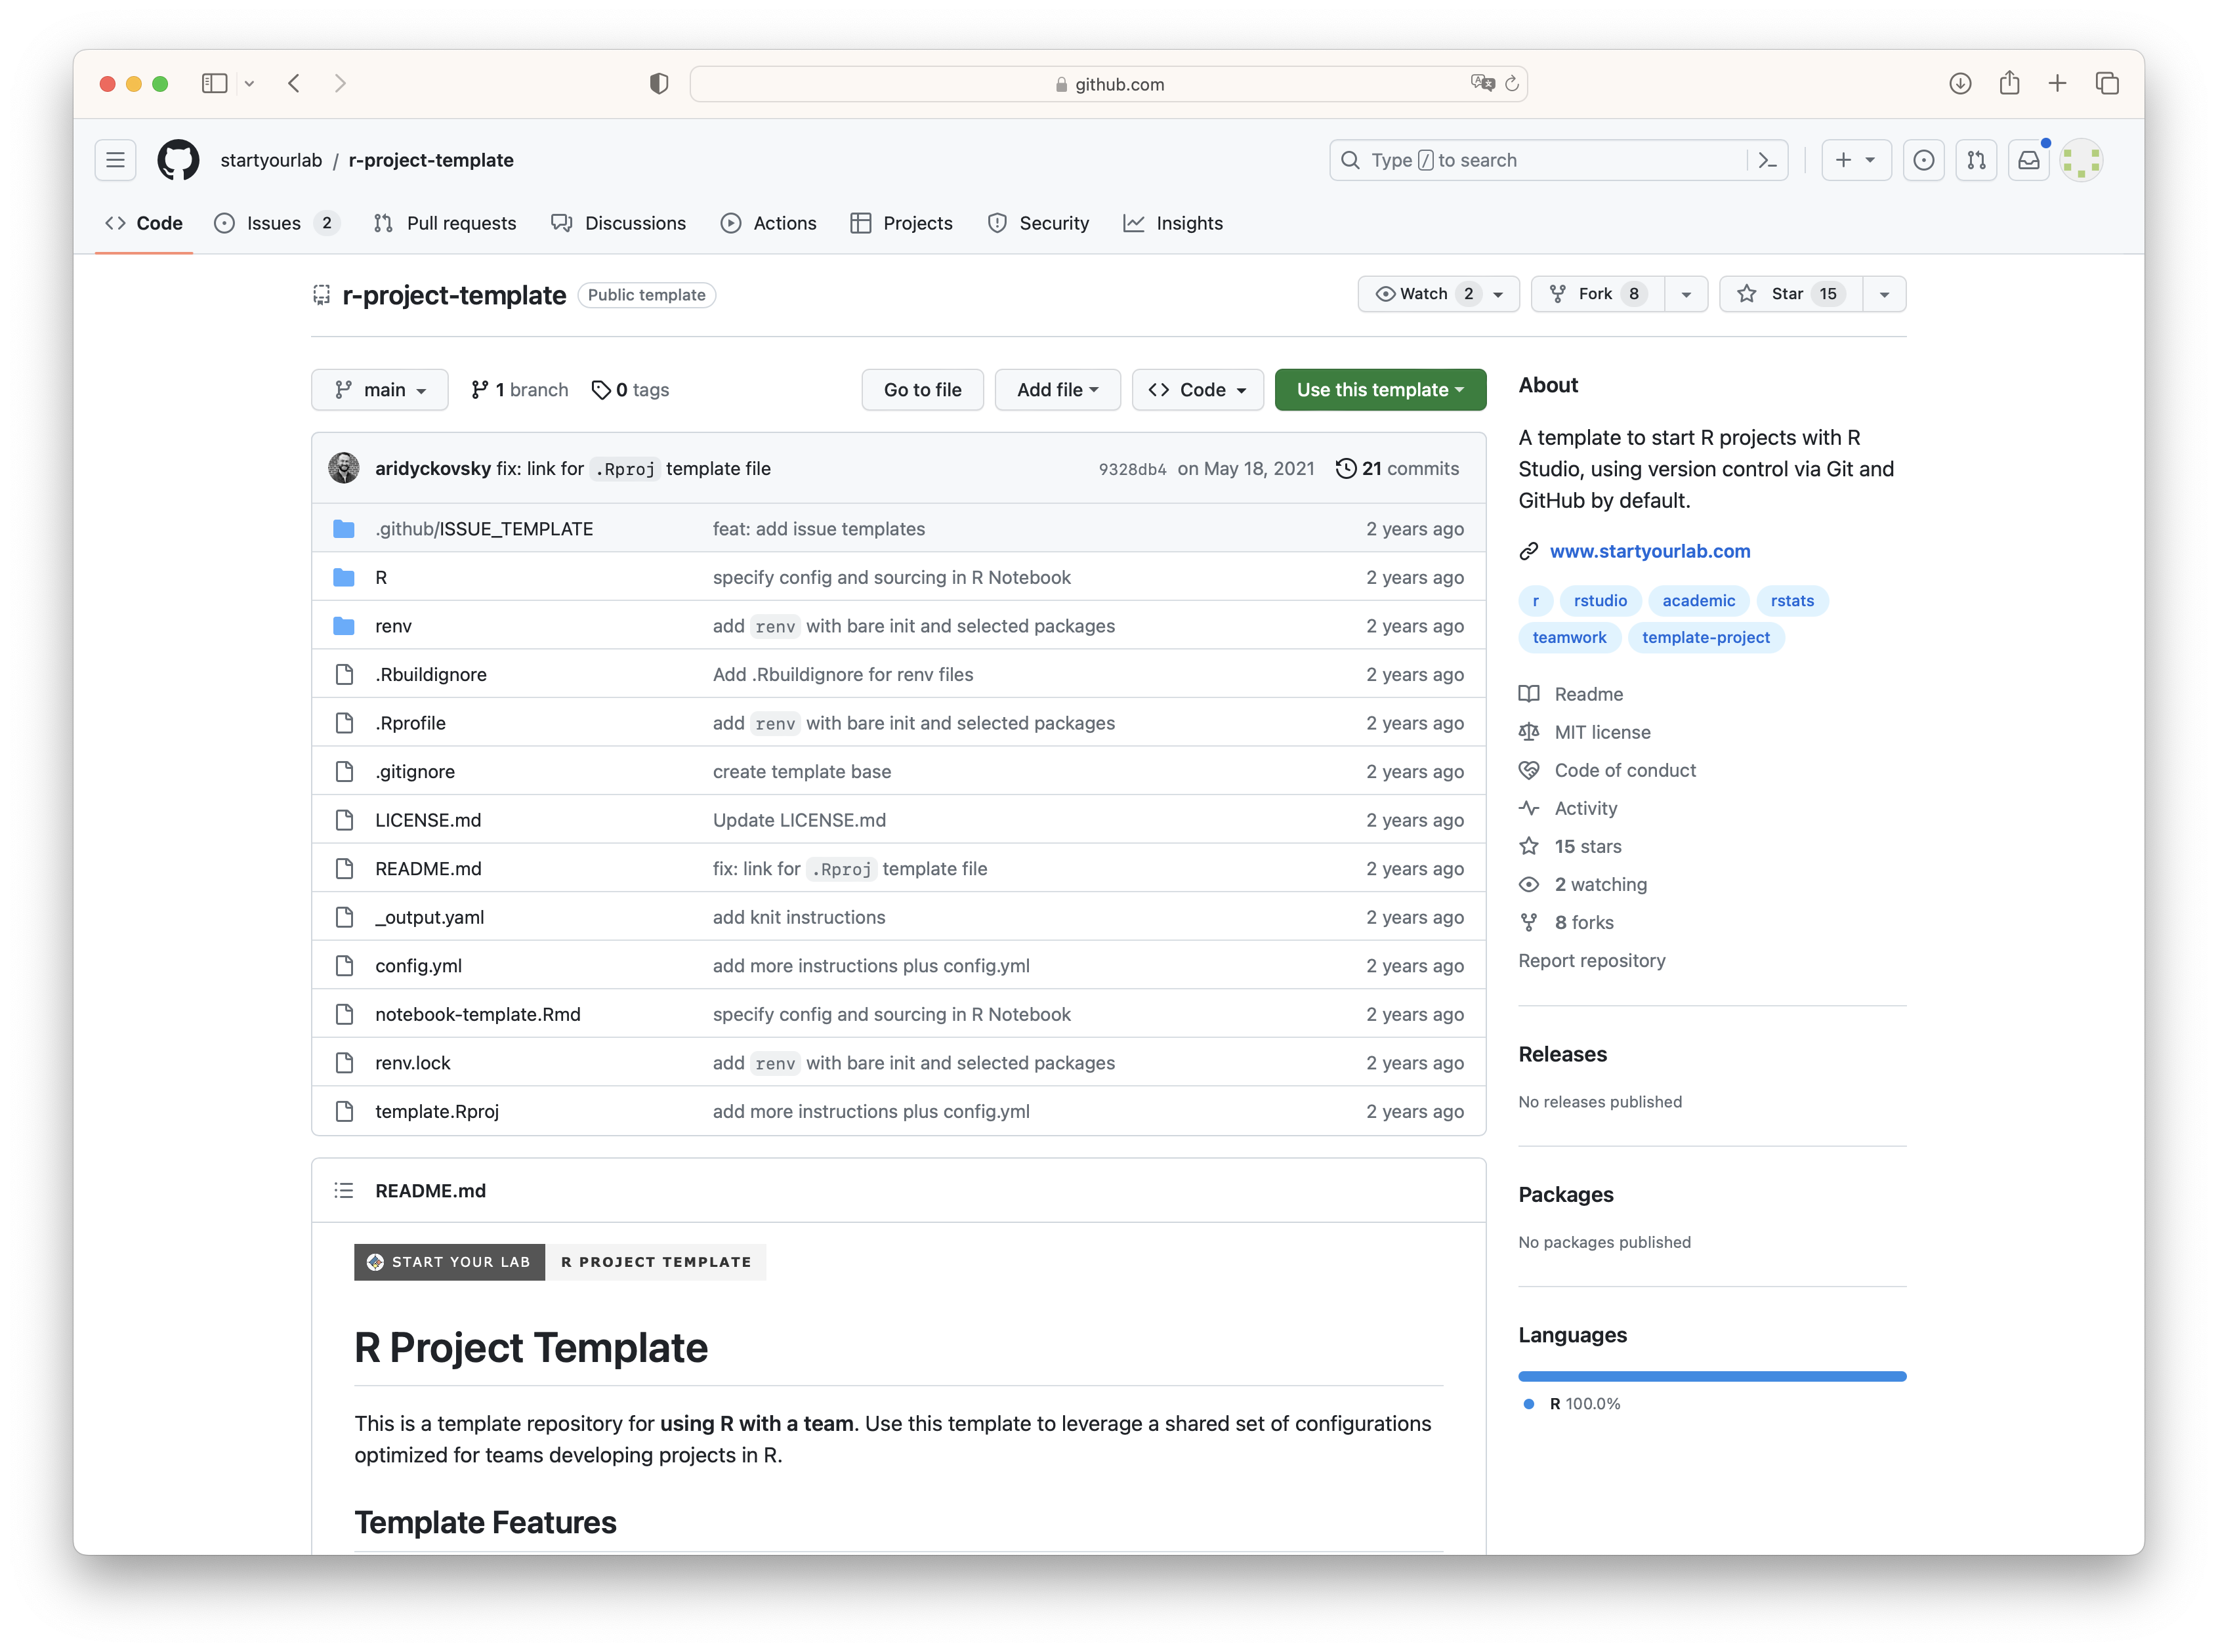
Template repositories, or repository templates, on GitHub allow you to create a repository that acts as a starting point for other new repositories. Instead of beginning a new project from scratch, you can use a template repository that already includes predefined files, directories, and even code. This simplifies the process of setting up new projects that share common characteristics or follow best practices. Template repositories have a “Use this template” button on a template repository page, as shown in Figure 11.2. Click it, provide a new repository name and an optional description and decide whether to include all branches and whether to create a public or private repository.
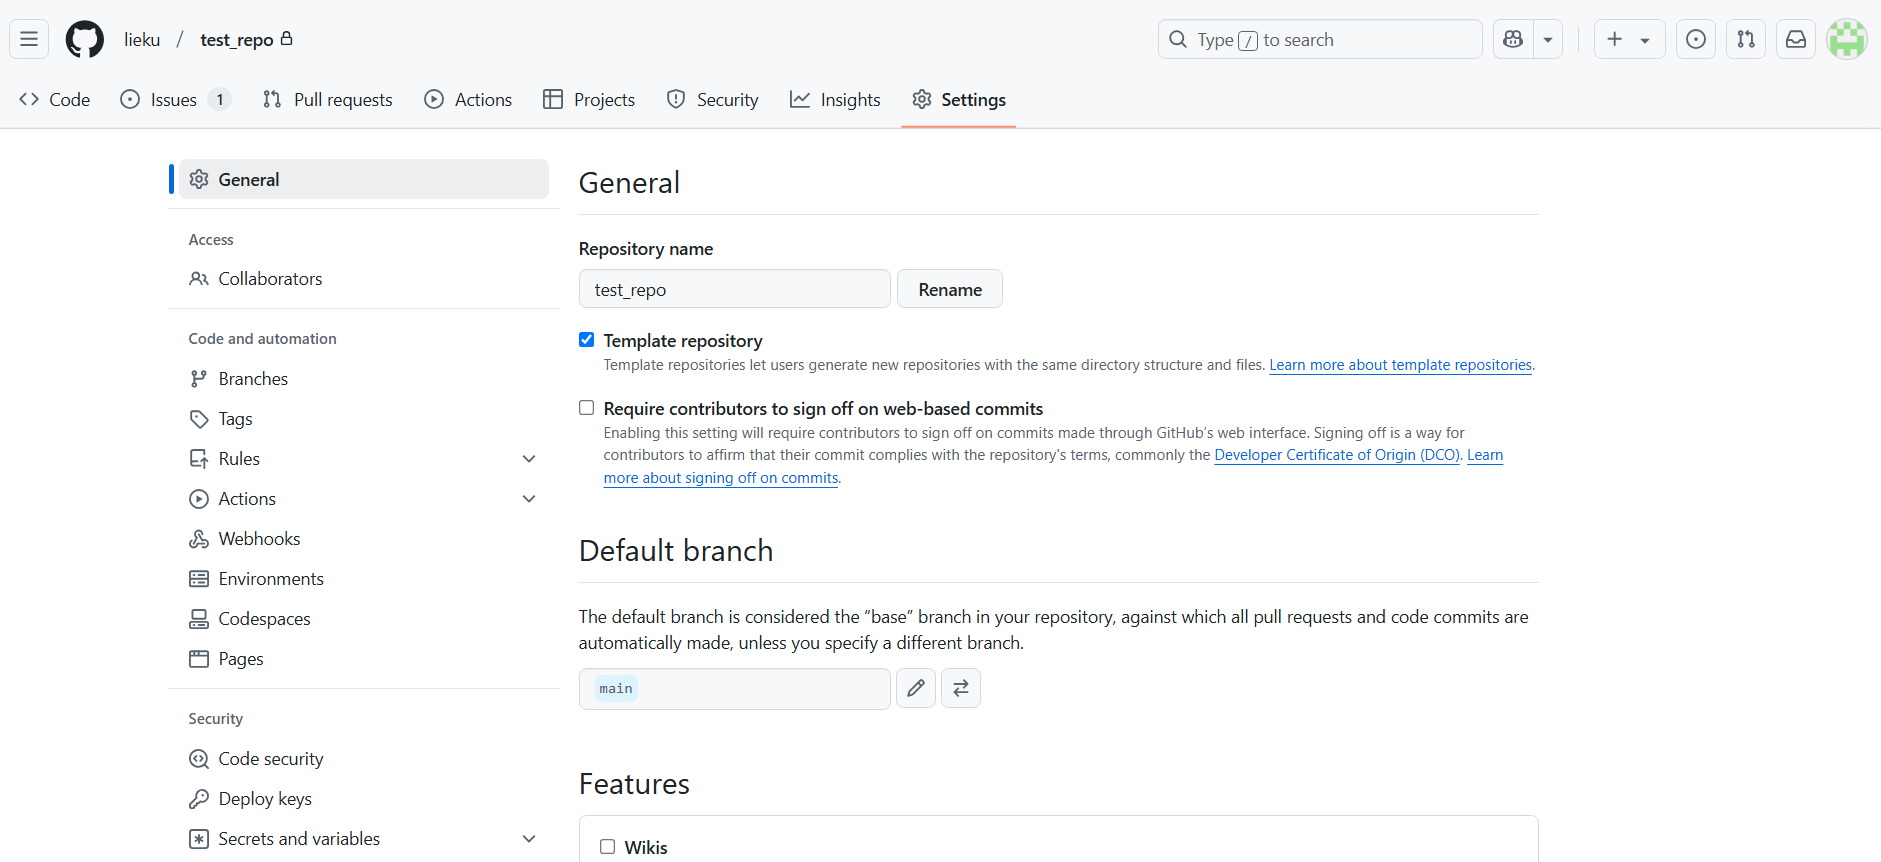
You can create templates from your repositories by enabling the Template repository option in your repository’s general settings, as shown in Figure 11.3. This makes your repository available as a template. Keep in mind that if your repository is public, others can also use it as a template. Alternatively, if you want to start a new repository using someone else’s template, search for template on GitHub to get a long list of options. To narrow down the results, it’s helpful to filter by your preferred programming language.
On GitHub, forking and template repositories are two ways to create a copy of an existing repository, but they have key differences in how they work:
In summary, forking is ideal for contributing to an existing project, as it keeps the connection to the original repository and allows you to submit changes. In contrast, template repositories are better for starting a new project based on an existing structure, with no connection to the original.
When using Git hosting platforms like GitHub or GitLab, it’s a good idea to enable branch protection rules for your critical branch(es), typically your main or master branch. By protecting it, you ensure that only reviewed and/or tested code gets merged into this branch. It also prevents accidental or unauthorized changes from being merged directly.
main branch on GitHubmain branch.main branch.A common option is to require pull request reviews. This requires one or more approving reviews before changes can be merged. Optionally, you can enable other protections, such as preventing force pushes or deleting the branch.
While GitHub is one of the most popular and widely used platforms for hosting Git repositories, there many alternatives to GitHub. Some prominent alternative include GitLab, Bitbucket, SourceForge or Codeberg.
Potential disadvantages of GitHub include limited free private repositories, privacy concerns and a potential vendor lock in. On the other hand there are also advantages to GitHub, for example it’s user-friendly interface, the rich ecosystem and it’s extensive integration to third-party tools.
| Authors | Title | Website | License | Source |
|---|---|---|---|---|
| The Turing Way Community (2022) | The Turing Way: A handbook for reproducible, ethical and collaborative research | CC BY 4.0 | ||
| Chacon and Straub (2014) | Pro Git | CC BY-NC | ||
| GitHub (2023) | GitHub Docs | CC BY-NC 4.0 |
| Command | Description |
|---|---|
git blame |
Shows the authorship and commit information of each line in a file |