13 Graphical User Interfaces
In this chapter, we will give an introduction to Graphical User Interfaces (GUIs) for Git. We will showcase two different, commonly used GUIs, including GitHub Desktop and GitKraken as well as the Git integration in RStudio. Finally, we will discuss specific use cases where a graphical user interface makes Git operations easier and less error-prone compared to the command-line.
13.1 Introduction to Git GUIs
Graphical User Interfaces (GUIs) offer a more user-friendly way to work with Git compared to the command-line, using visual buttons and indicators instead of text commands. They show your project’s history, branches, and changes in a more colorful and easy-to-understand manner.
GUIs make Git appear less scary and more accessible to everyone, helping you manage your code, without the hassle of remembering complex text-based commands in the command-line. While Git GUIs offer a user-friendly approach to version control, they come with a few limitations. One notable drawback is their reduced flexibility compared to the command-line interface. GUIs are designed to simplify common tasks, but more advanced or customized operations may be challenging to perform within a graphical environment. Despite their user-friendly design, understanding the underlying Git concepts and the specific workflow of a GUI is still very important.
As this book primarily emphasizes learning Git through the command line interface, this chapter will only feature a short introduction, but not extensive tutorials for GUI tools.
13.2 Popular Git GUIs
There is a wide variety of Git GUIs available, and each of them offers its own set of features and benefits, catering to different preferences and workflows. In this section, we will focus on GitHub Desktop and GitKraken, although many more options exist. For a more comprehensive overview, you can explore the official Git website.
Whilst it is possible to switch between different GUIs or use multiple at the same time, you might just want to focus on one. If that’s the case, here are some considerations regarding GitHub Desktop and GitKraken that could help you decide which one is a better fit for you and your projects.
First of all, for Linux users, GitHub Desktop simply doesn’t offer an official version. Another factor can be cost, as GitHub Desktop is free to use, while GitKraken is only free for students or during a 7-day trial period. Overall, GitHub Desktop offers a simpler interface, making it more intuitive for beginners. However, this simplicity comes at the cost of having fewer features compared to GitKraken, which could be limiting if you want to perform more complex tasks. GitHub Desktop is very well integrated with GitHub, but can be restricting if you want to work with repositories hosted on other platforms. In that case, GitKraken offers better support for a wider range of Git hosting services.
13.2.1 GitHub Desktop
13.2.1.1 Download
GitHub Desktop is a desktop application developed by GitHub. It is free to download for macOS and Windows on the GitHub website. There is currently no official version available for Linux.
13.2.1.2 Setup
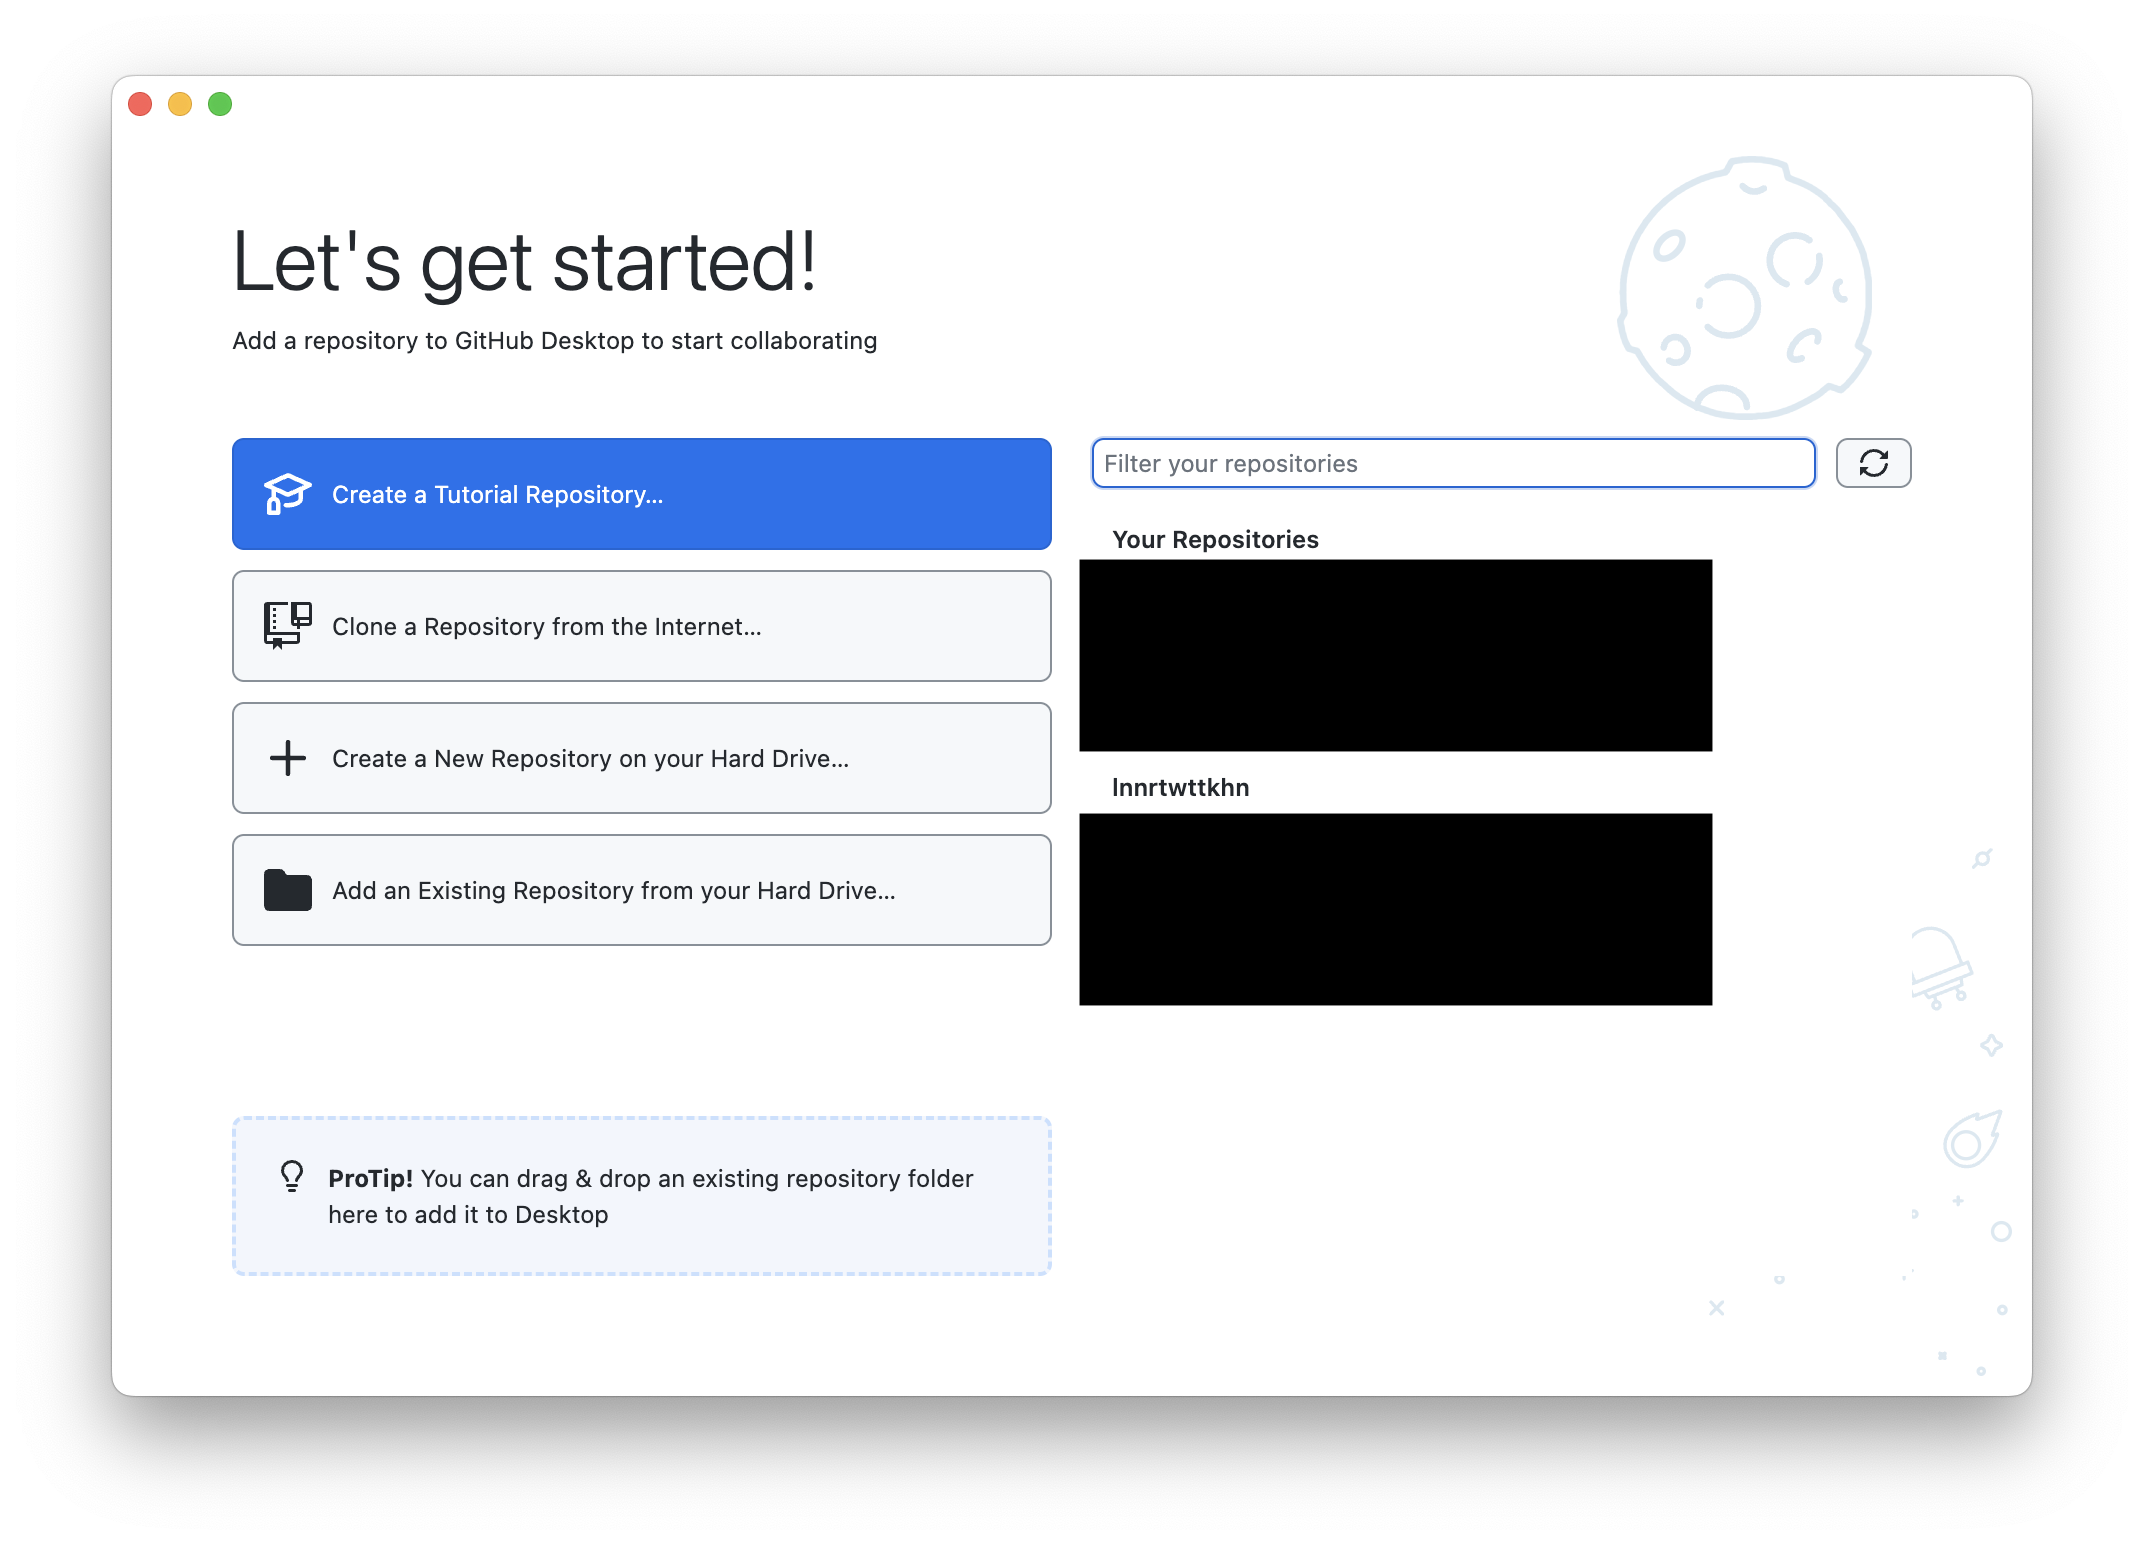
After you download and install the program, you will be required to log in using your GitHub account. Once logged in, you can select a repository to work on, either from GitHub or a local repository (as shown in Figure 13.1).
Once you’ve picked a repository to work on, GitHub Desktop shows you the history of that repository in a visual way. You’ll see branches, commits, and tags displayed on a timeline in chronological order. This setup makes it easy to dive into version control tasks like handling branches, commits, changes, and pull requests.
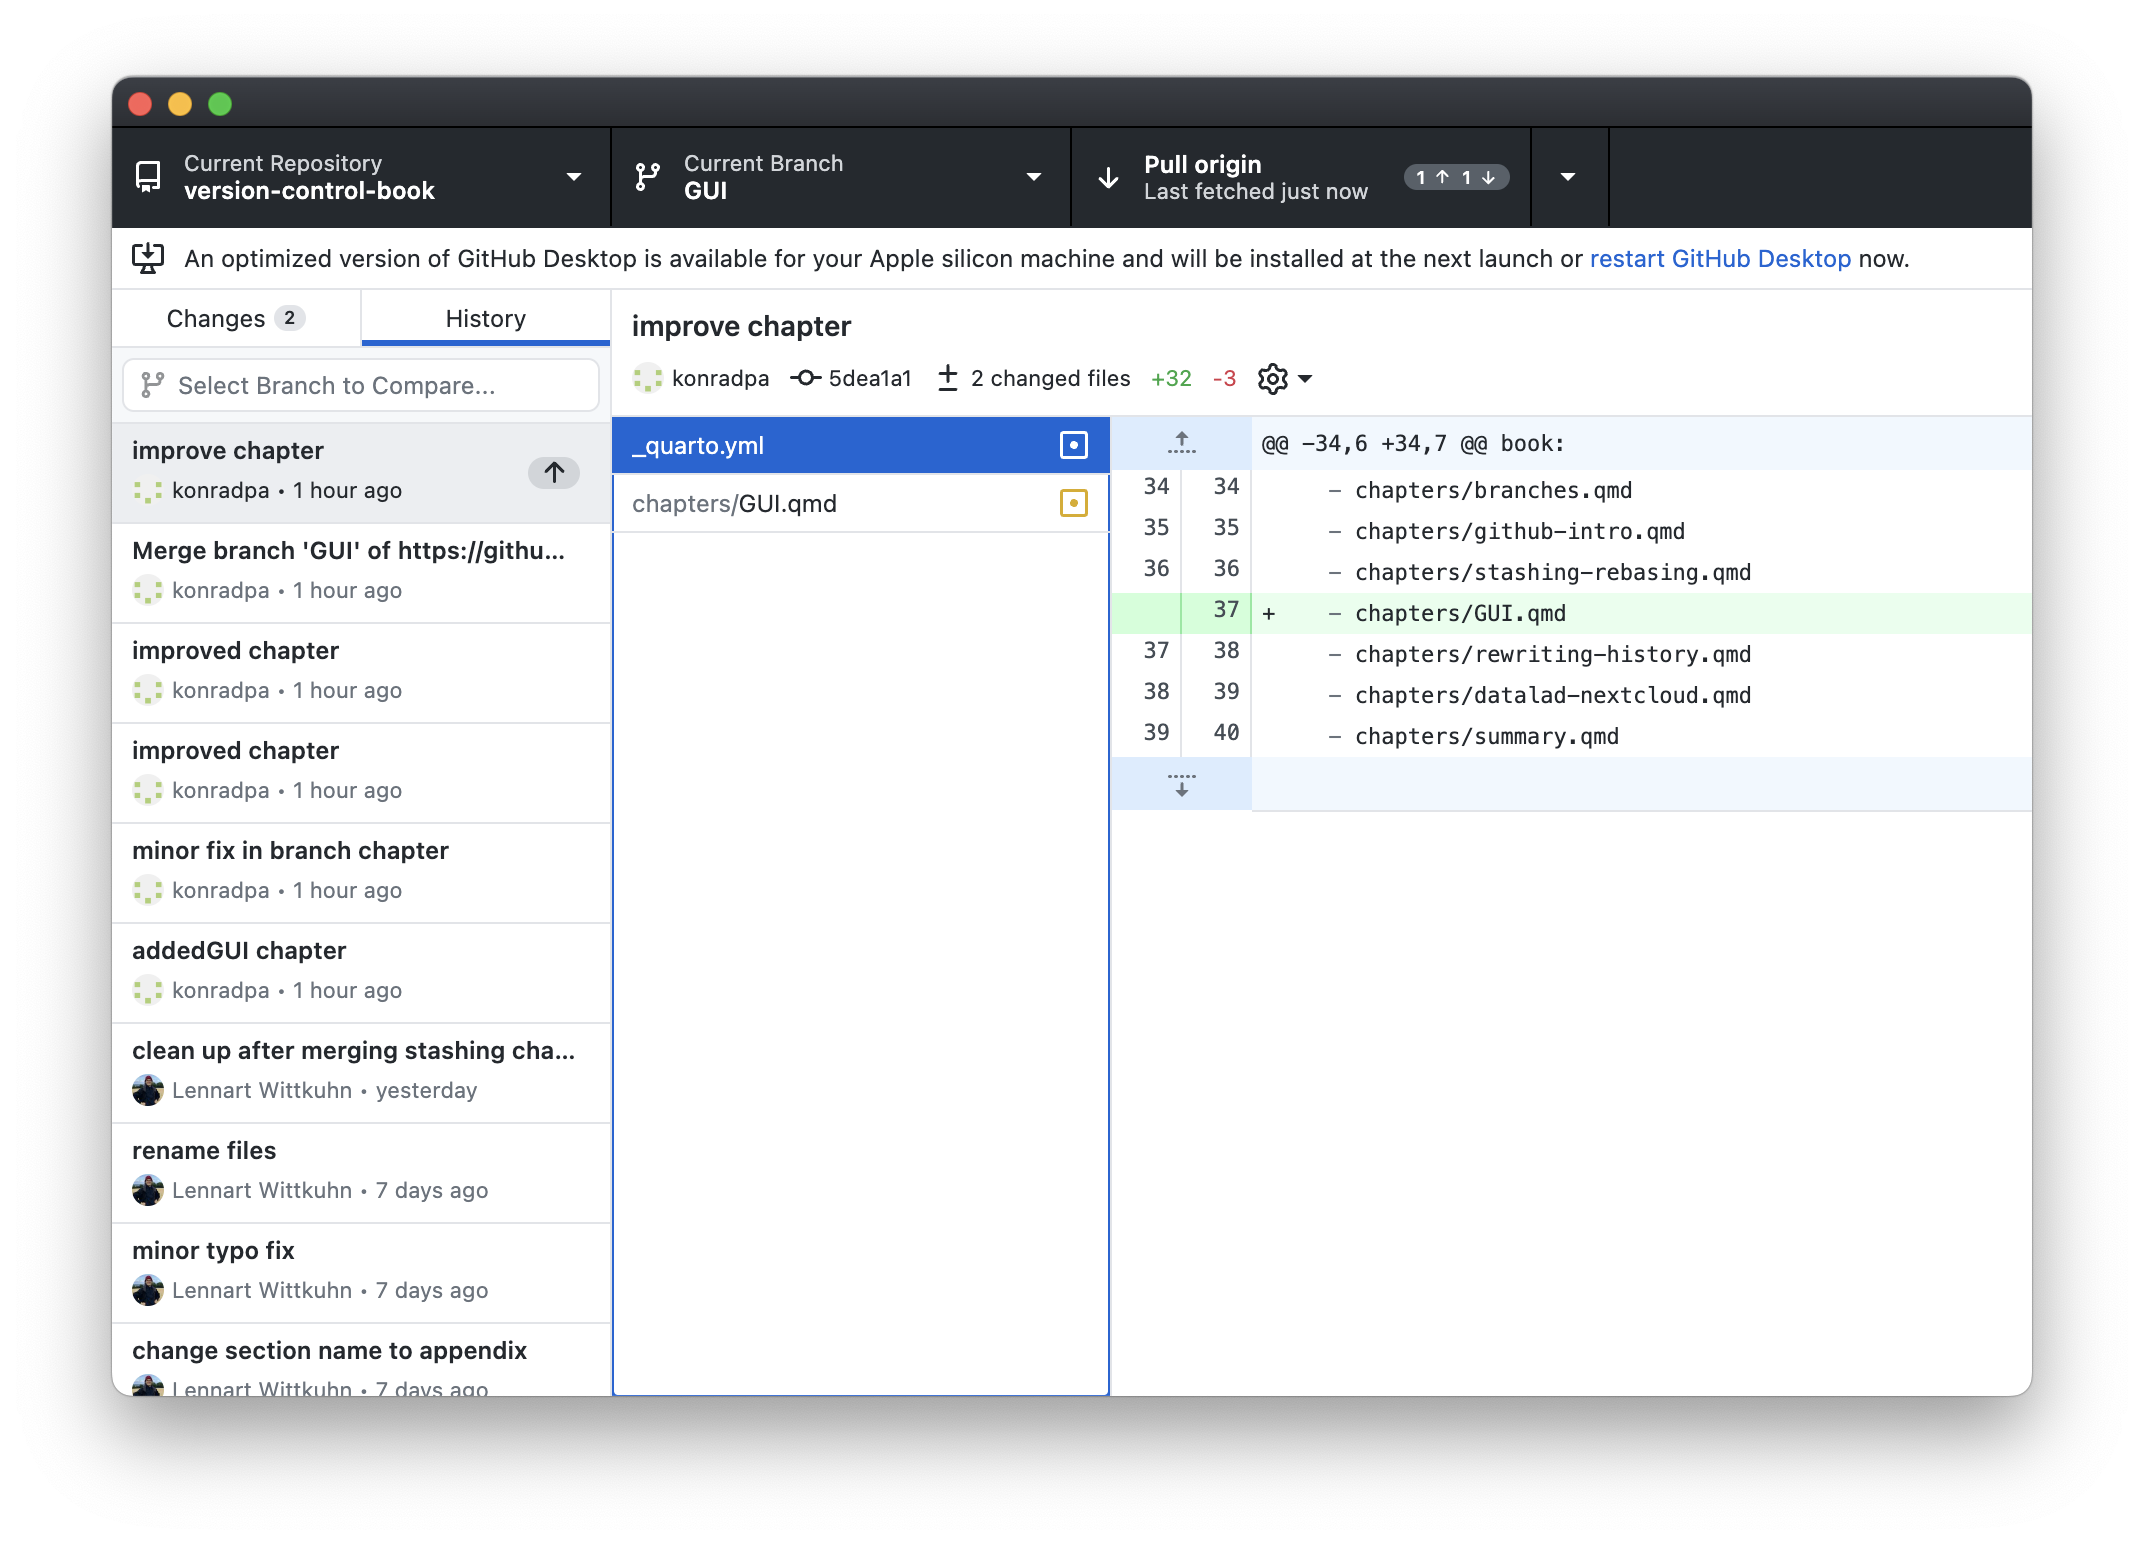
For a more extensive GitHub Desktop tutorial, you can check out the GitHub documentation.
GitHub Desktop’s interface is simple and user-friendly. Its primary advantage lies in its integration with GitHub. However, this dependency can also be limiting if you’re looking to work with repositories on alternative Git hosting services.
13.2.2 GitKraken
13.2.2.1 Download
GitKraken is a third-party program and another very popular Git GUI for Windows, macOS and Linux. You can download it from the official website. Normally, GitKraken only offers a free seven-day trial period. However, if you are a student, you can get it for free, through the GitHub Student Developer Pack.
13.2.2.2 Setup
After downloading, you either begin to track a local repository or log in to a hosting website like GitHub (but also to other ones) and work with your repositories from there.
After choosing a repository to track, you will see a visual representation of the commit history, branches, and commits.
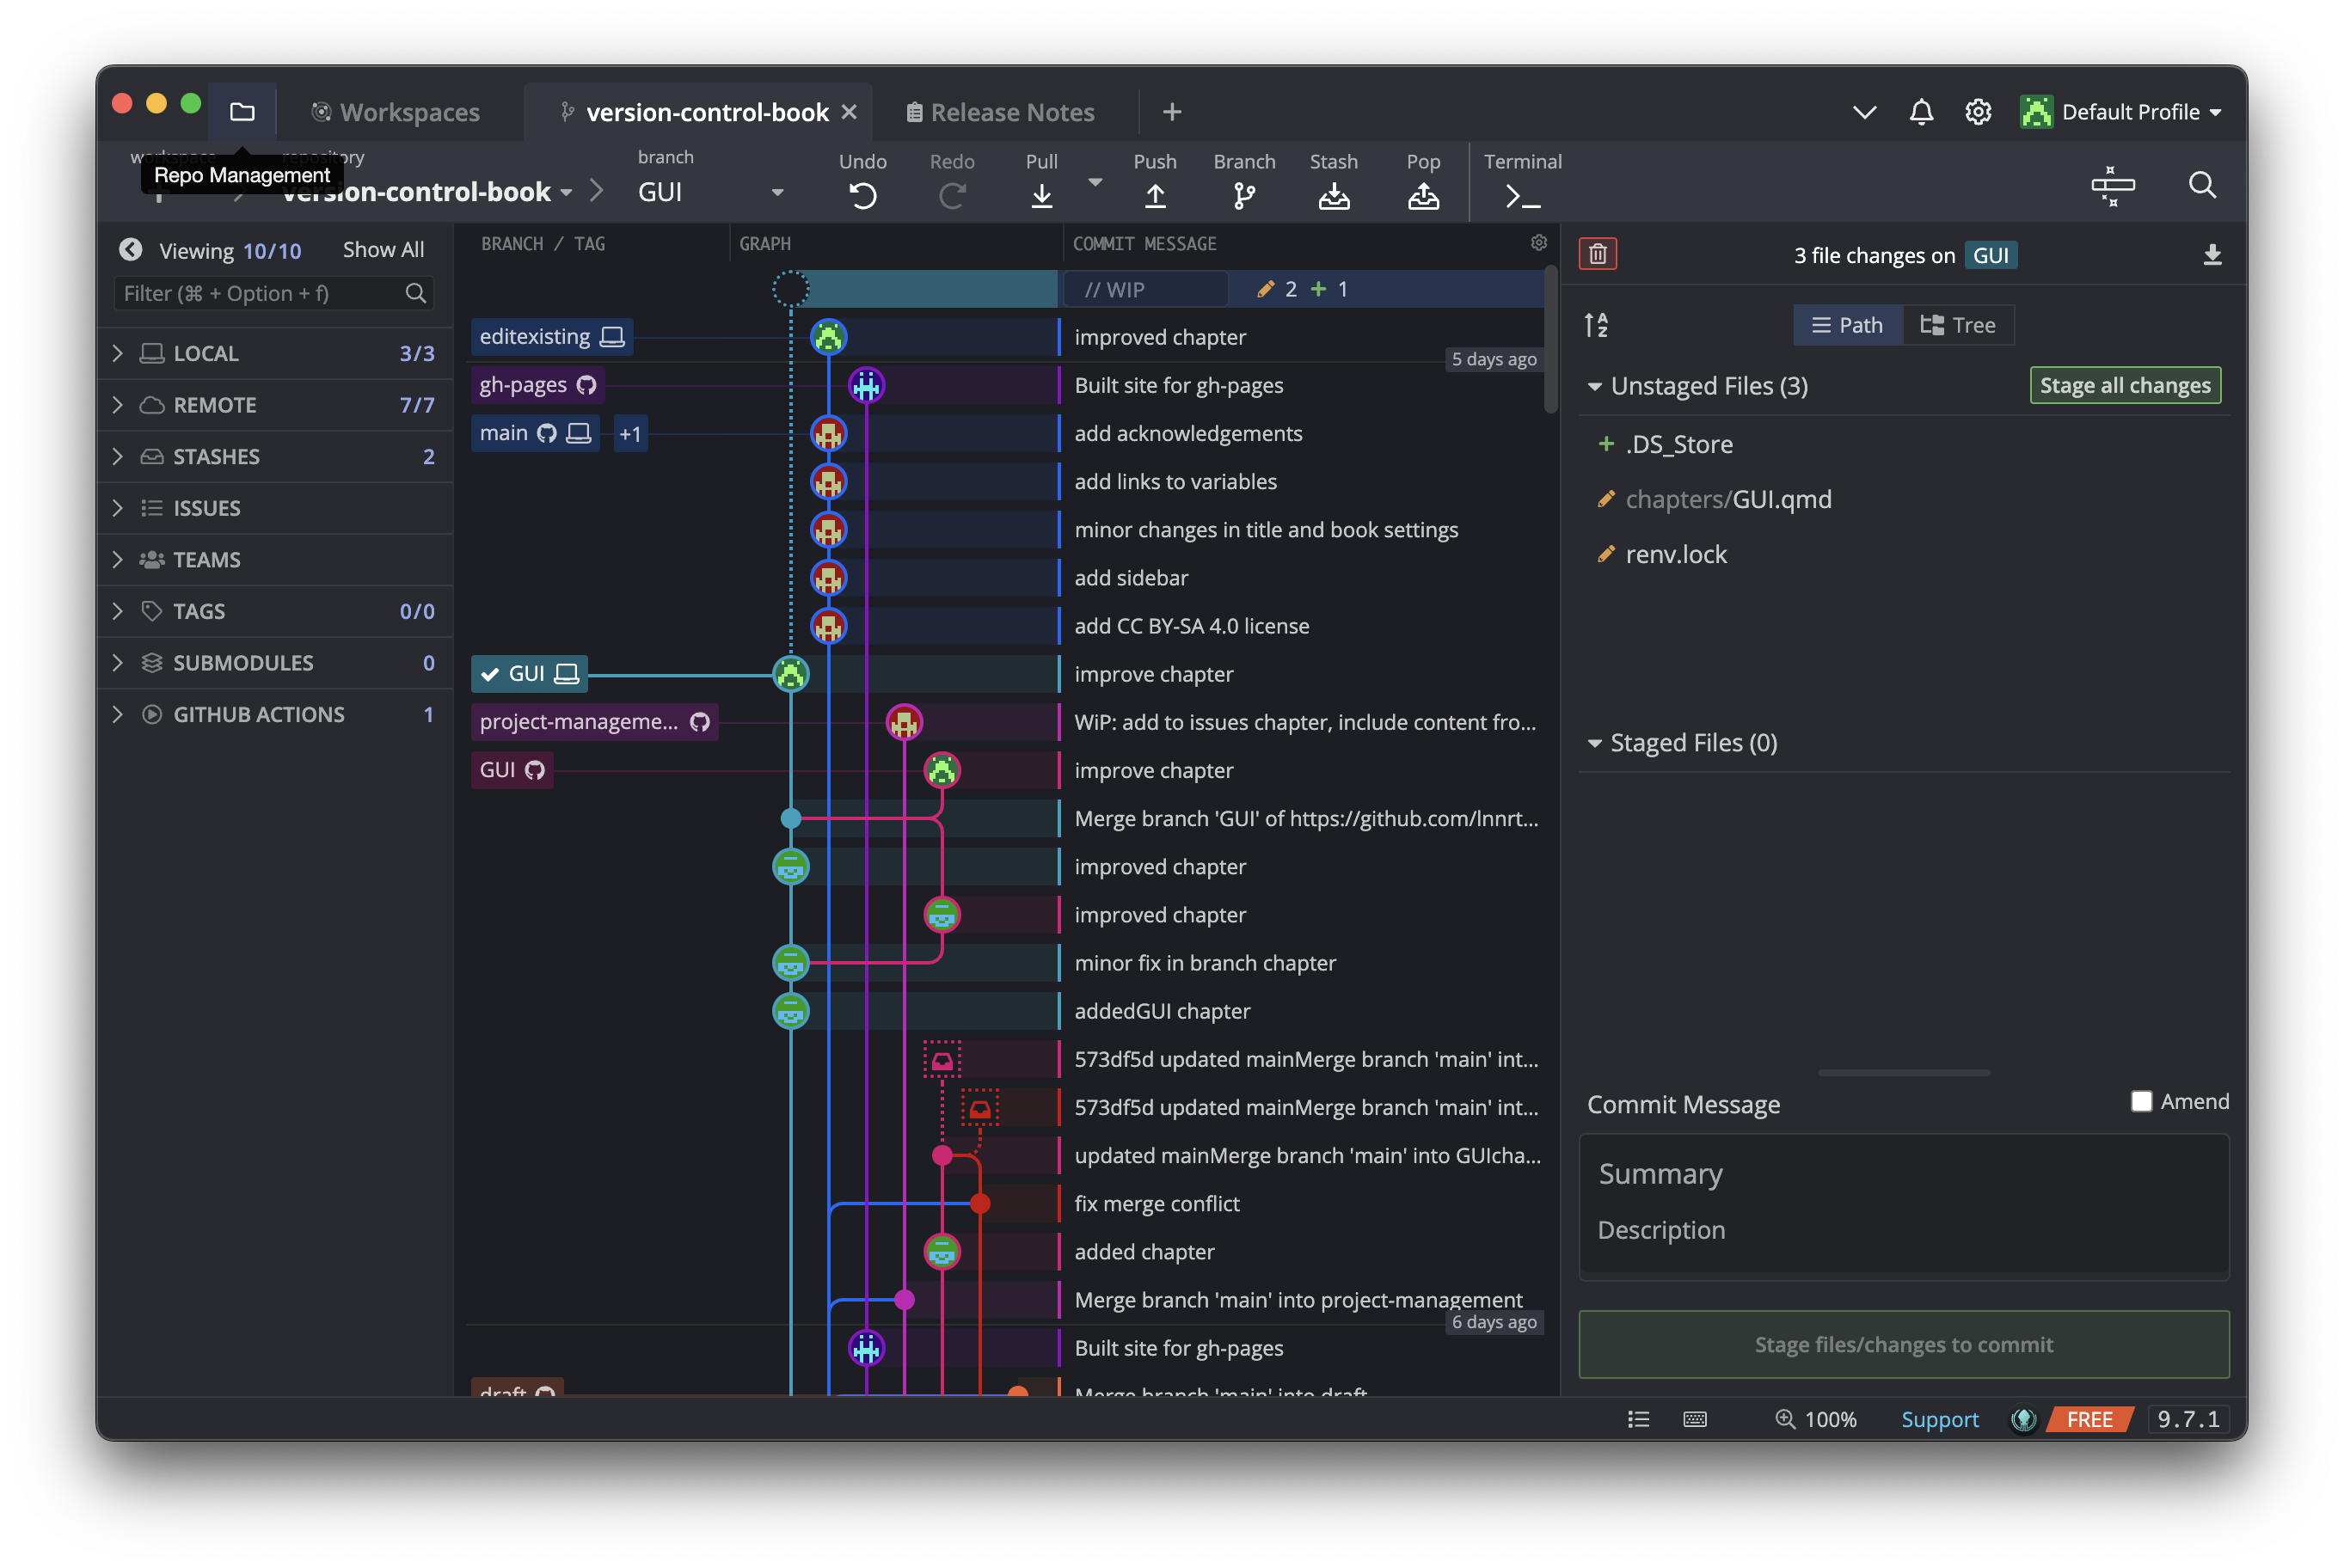
Just like with GitHub Desktop, your are able to manage your branches, push to or pull from remote branches and commit changes through GitKraken. For an extensive tutorial, you can check out the GitKraken Client Documentation.
13.3 Use cases for Git GUIs
You can perform a wide range of basic and advanced Git operations with GUIs. Here, we present a few Git use cases where the use of a GUI can be particularly helpful as compared to doing the same thing from the command-line.
13.3.1 Partial commits
One useful feature of Git GUIs is the ability to easily commit only specific parts or “hunks” of code from within a file. This is particularly handy when you’ve made changes to different parts of a file and want to commit them separately to group related changes together and keep a clean commit history. With a Git GUI, you can easily select the lines or blocks of code you want to include in a commit, stage them, and then commit just those changes.
For example, to do this in GitKraken, change a file, then click on your last commit in the GitKraken GUI (see Figure 13.5). You will see a list of unstaged files with changes. After you click on one, you will see your additions highlighted green and your deletions highlighted red. If you hover over the changed lines you will see the option to “Stage this Line”. To stage multiple lines at the same time, highlight the ones you want to stage, do a right-click and select “Stage selected lines”. You can also stage the whole file or “hunk” and unstage specific changes.
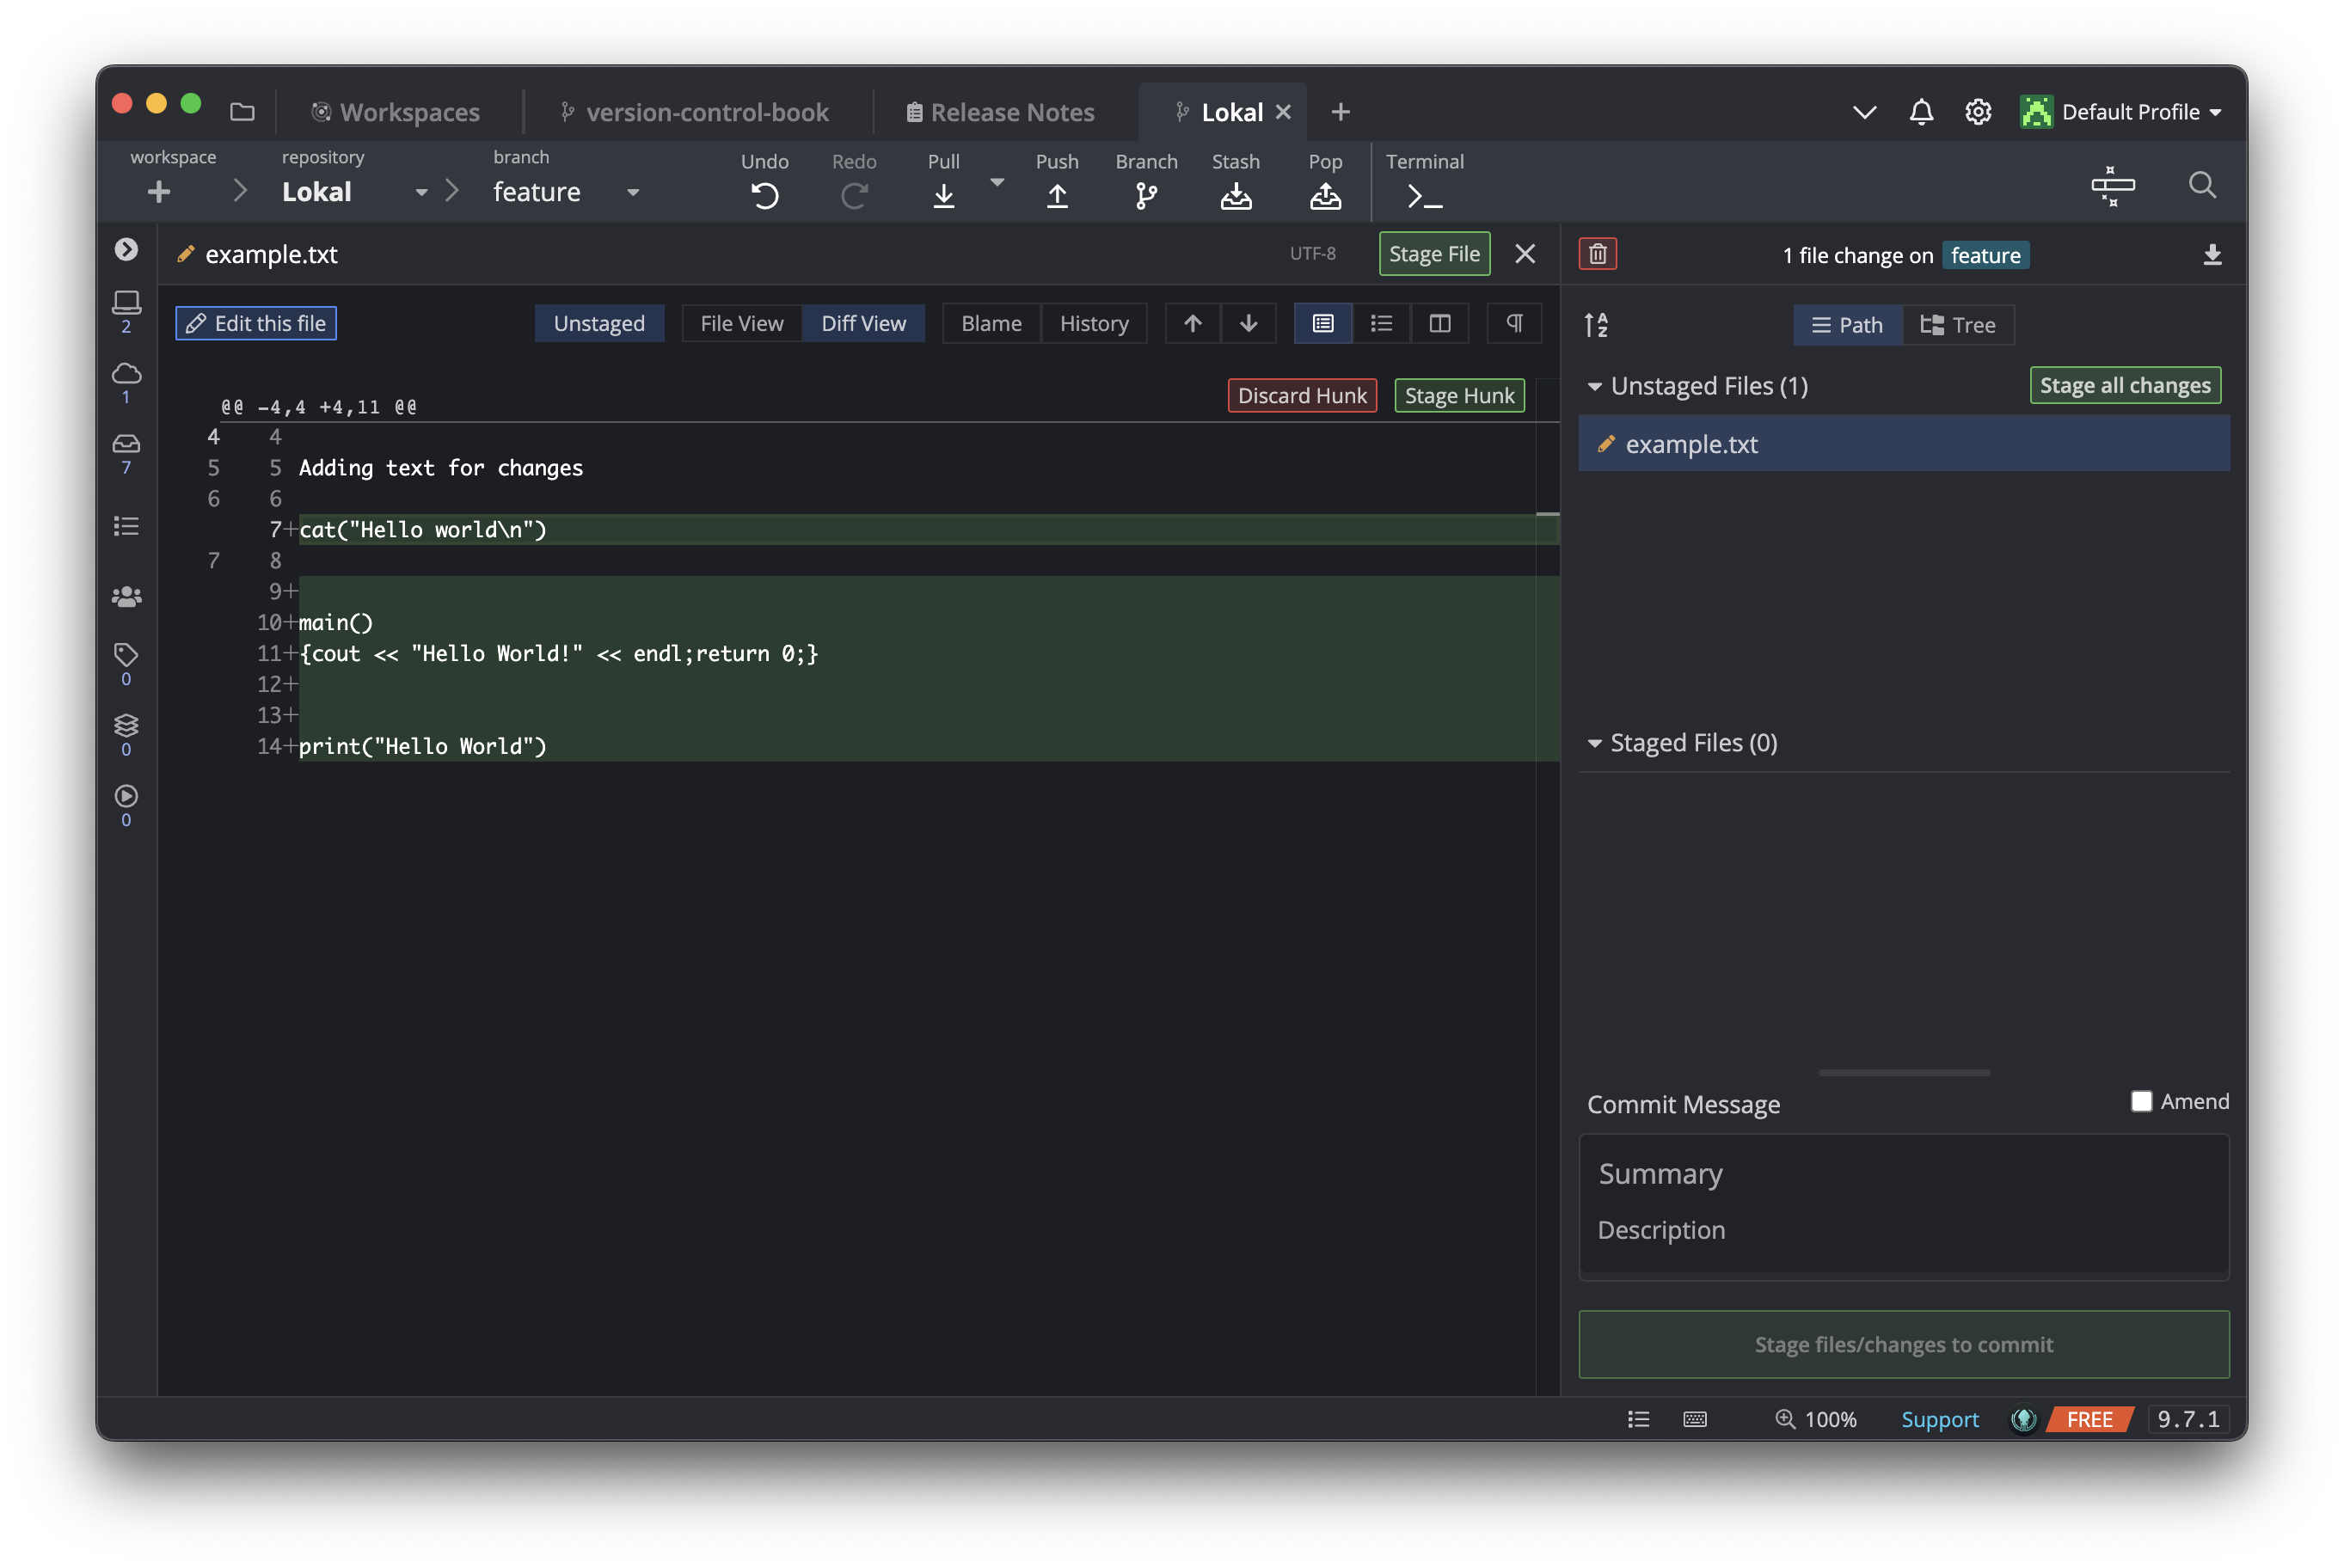
In Git, a “hunk” refers to a distinct block of code changes within a file. It represents a cohesive set of added, modified, or deleted lines in a specific location. Git automatically divides changes into hunks to facilitate easier review, selective staging, and conflict resolution during version control operations.
You can also create a partial commit in GitHub Desktop. For details, see the GitHub Desktop documentation.
13.3.2 Merge conflict resolution
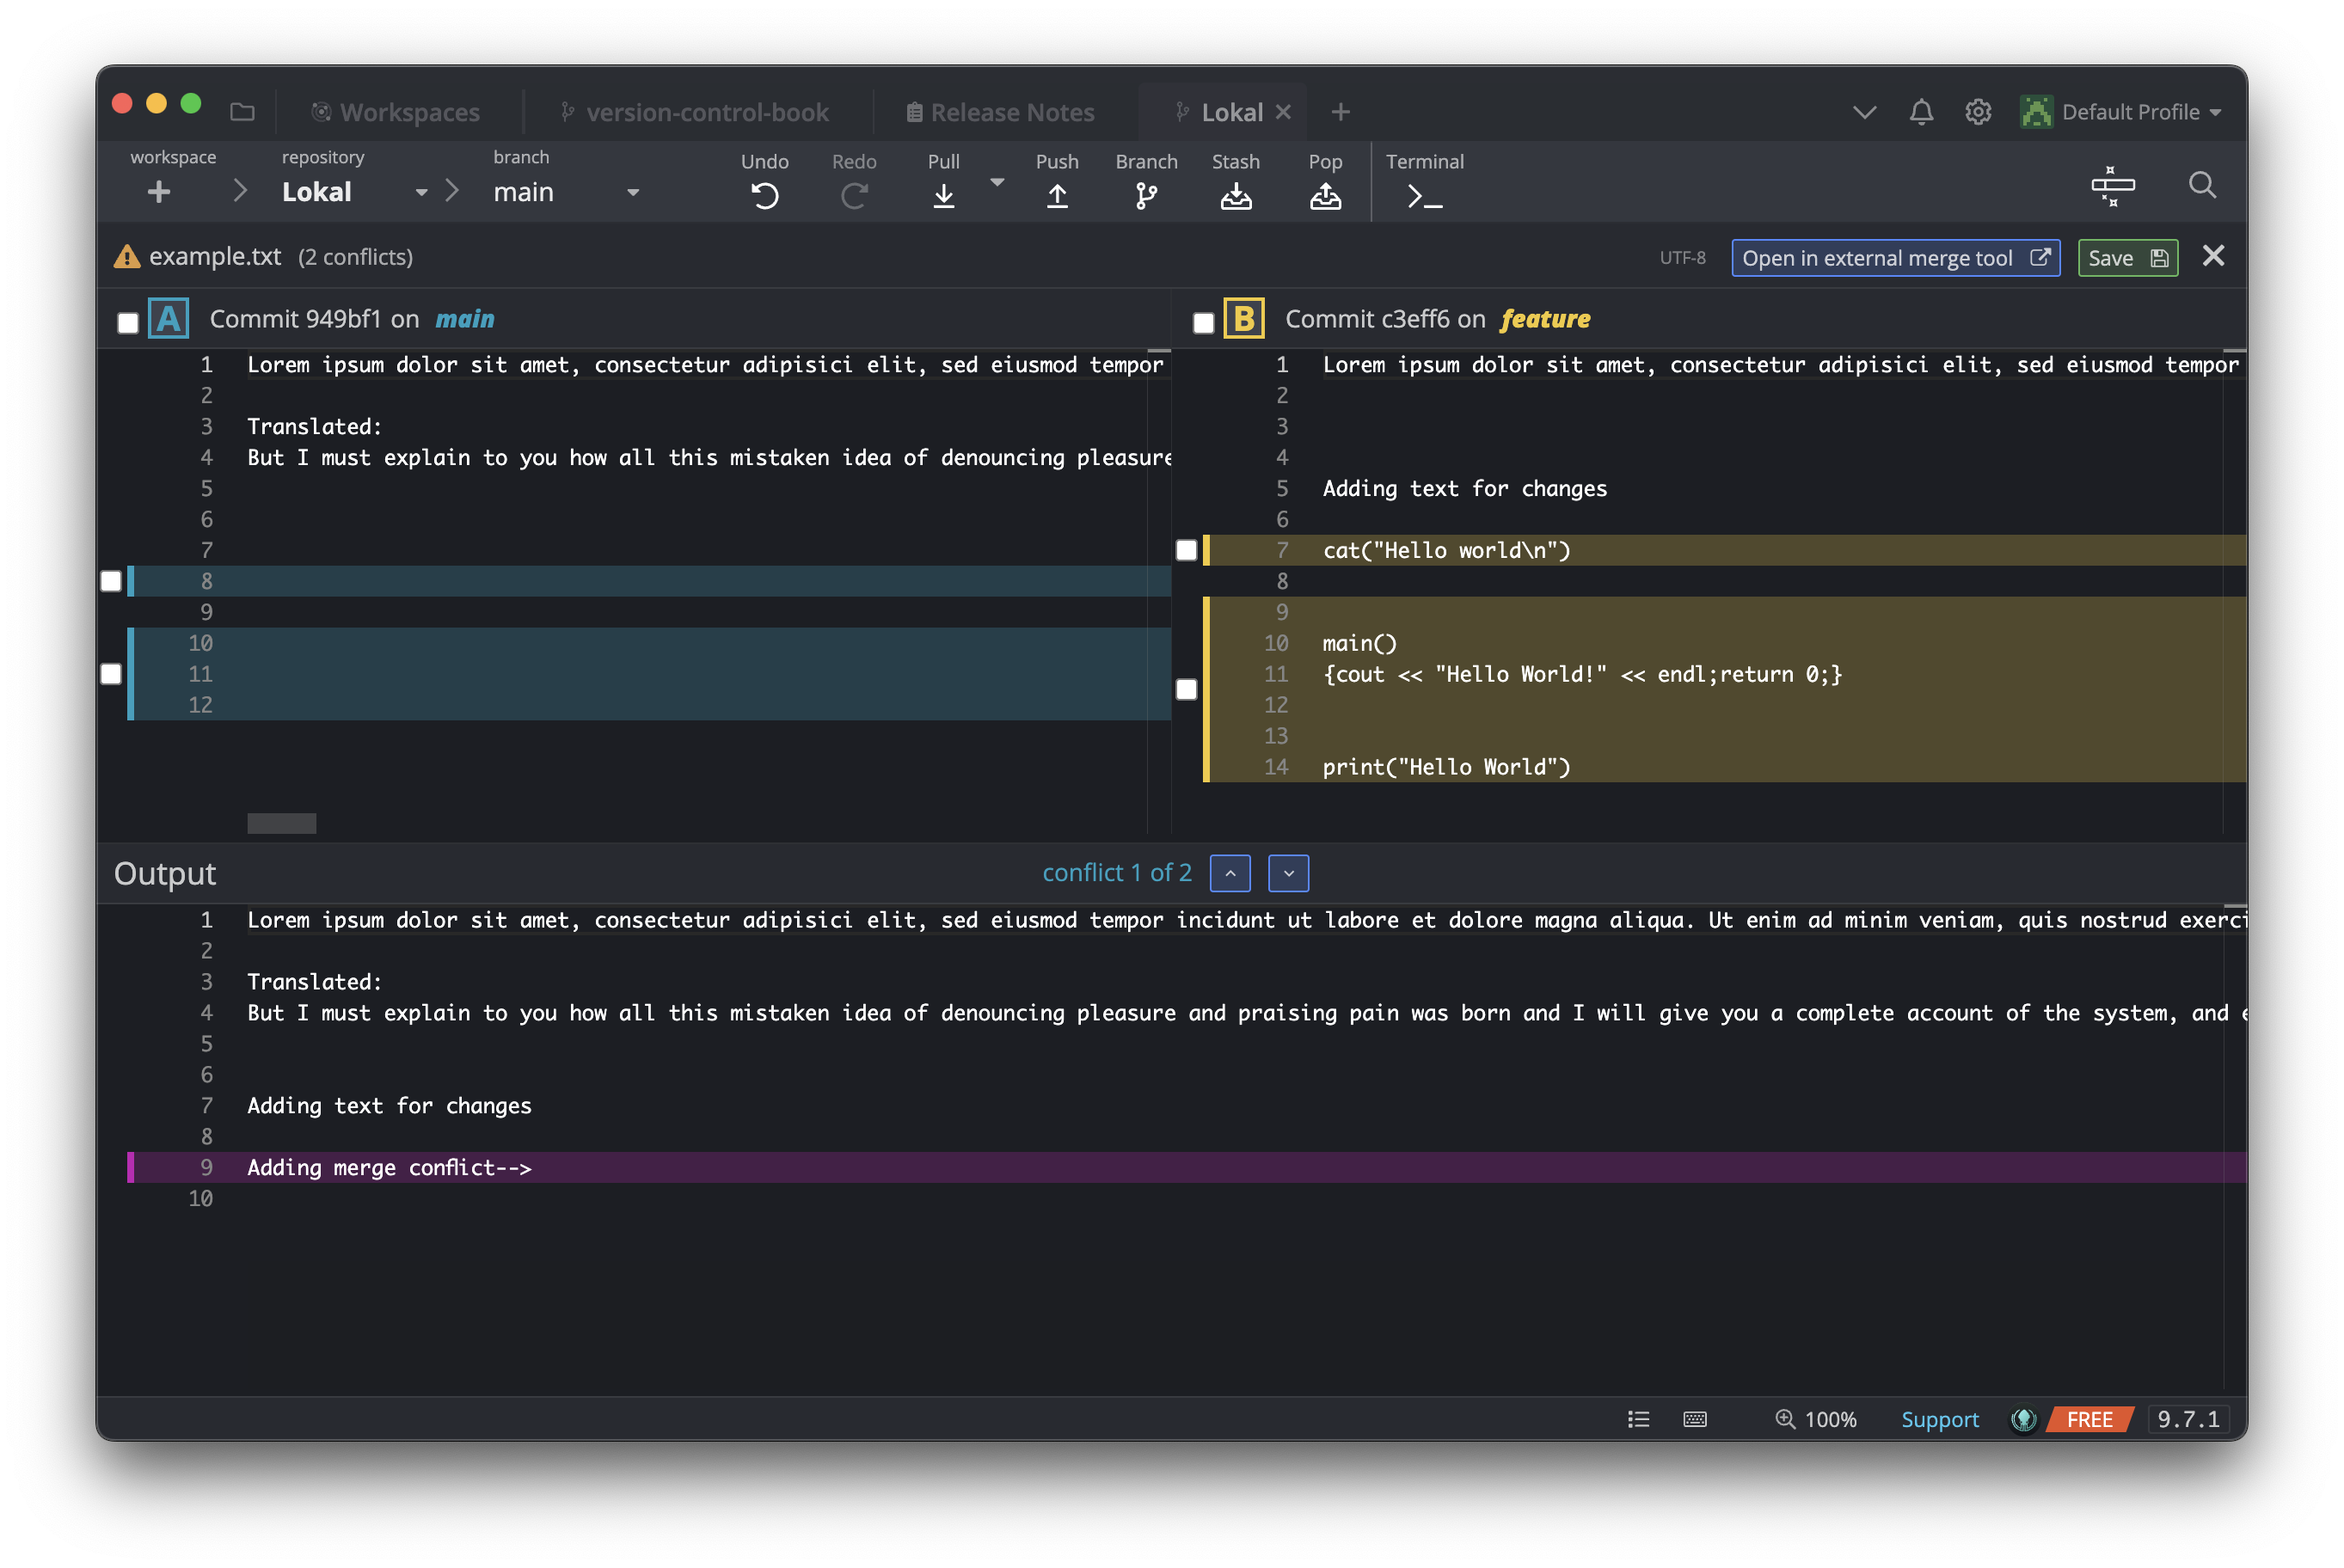
Git GUIs make resolving merge conflicts more intuitive. When conflicts arise due to incompatible changes made in different branches, a GUI helps you identify conflicting lines side by side. You can then select which changes to keep, discard, or modify. The graphical representation simplifies the process.
To merge two branches in GitKraken, you can either drag and drop one branch onto another branch or use the right-click menu of the branch you want to merge in. If a merge conflict occurs you will see a list of conflicted files. When you click on a file, it will show you a side-by-side comparison of the conflicting changes, allowing you to choose which lines to keep. After resolving all conflicts, you can continue the merge process by completing the merge commit.
13.4 Git Integration in RStudio
Even though it is not a complete GUI, RStudio Desktop, the most popular development environment for programming, offers Git integration to simplify version control within your projects.
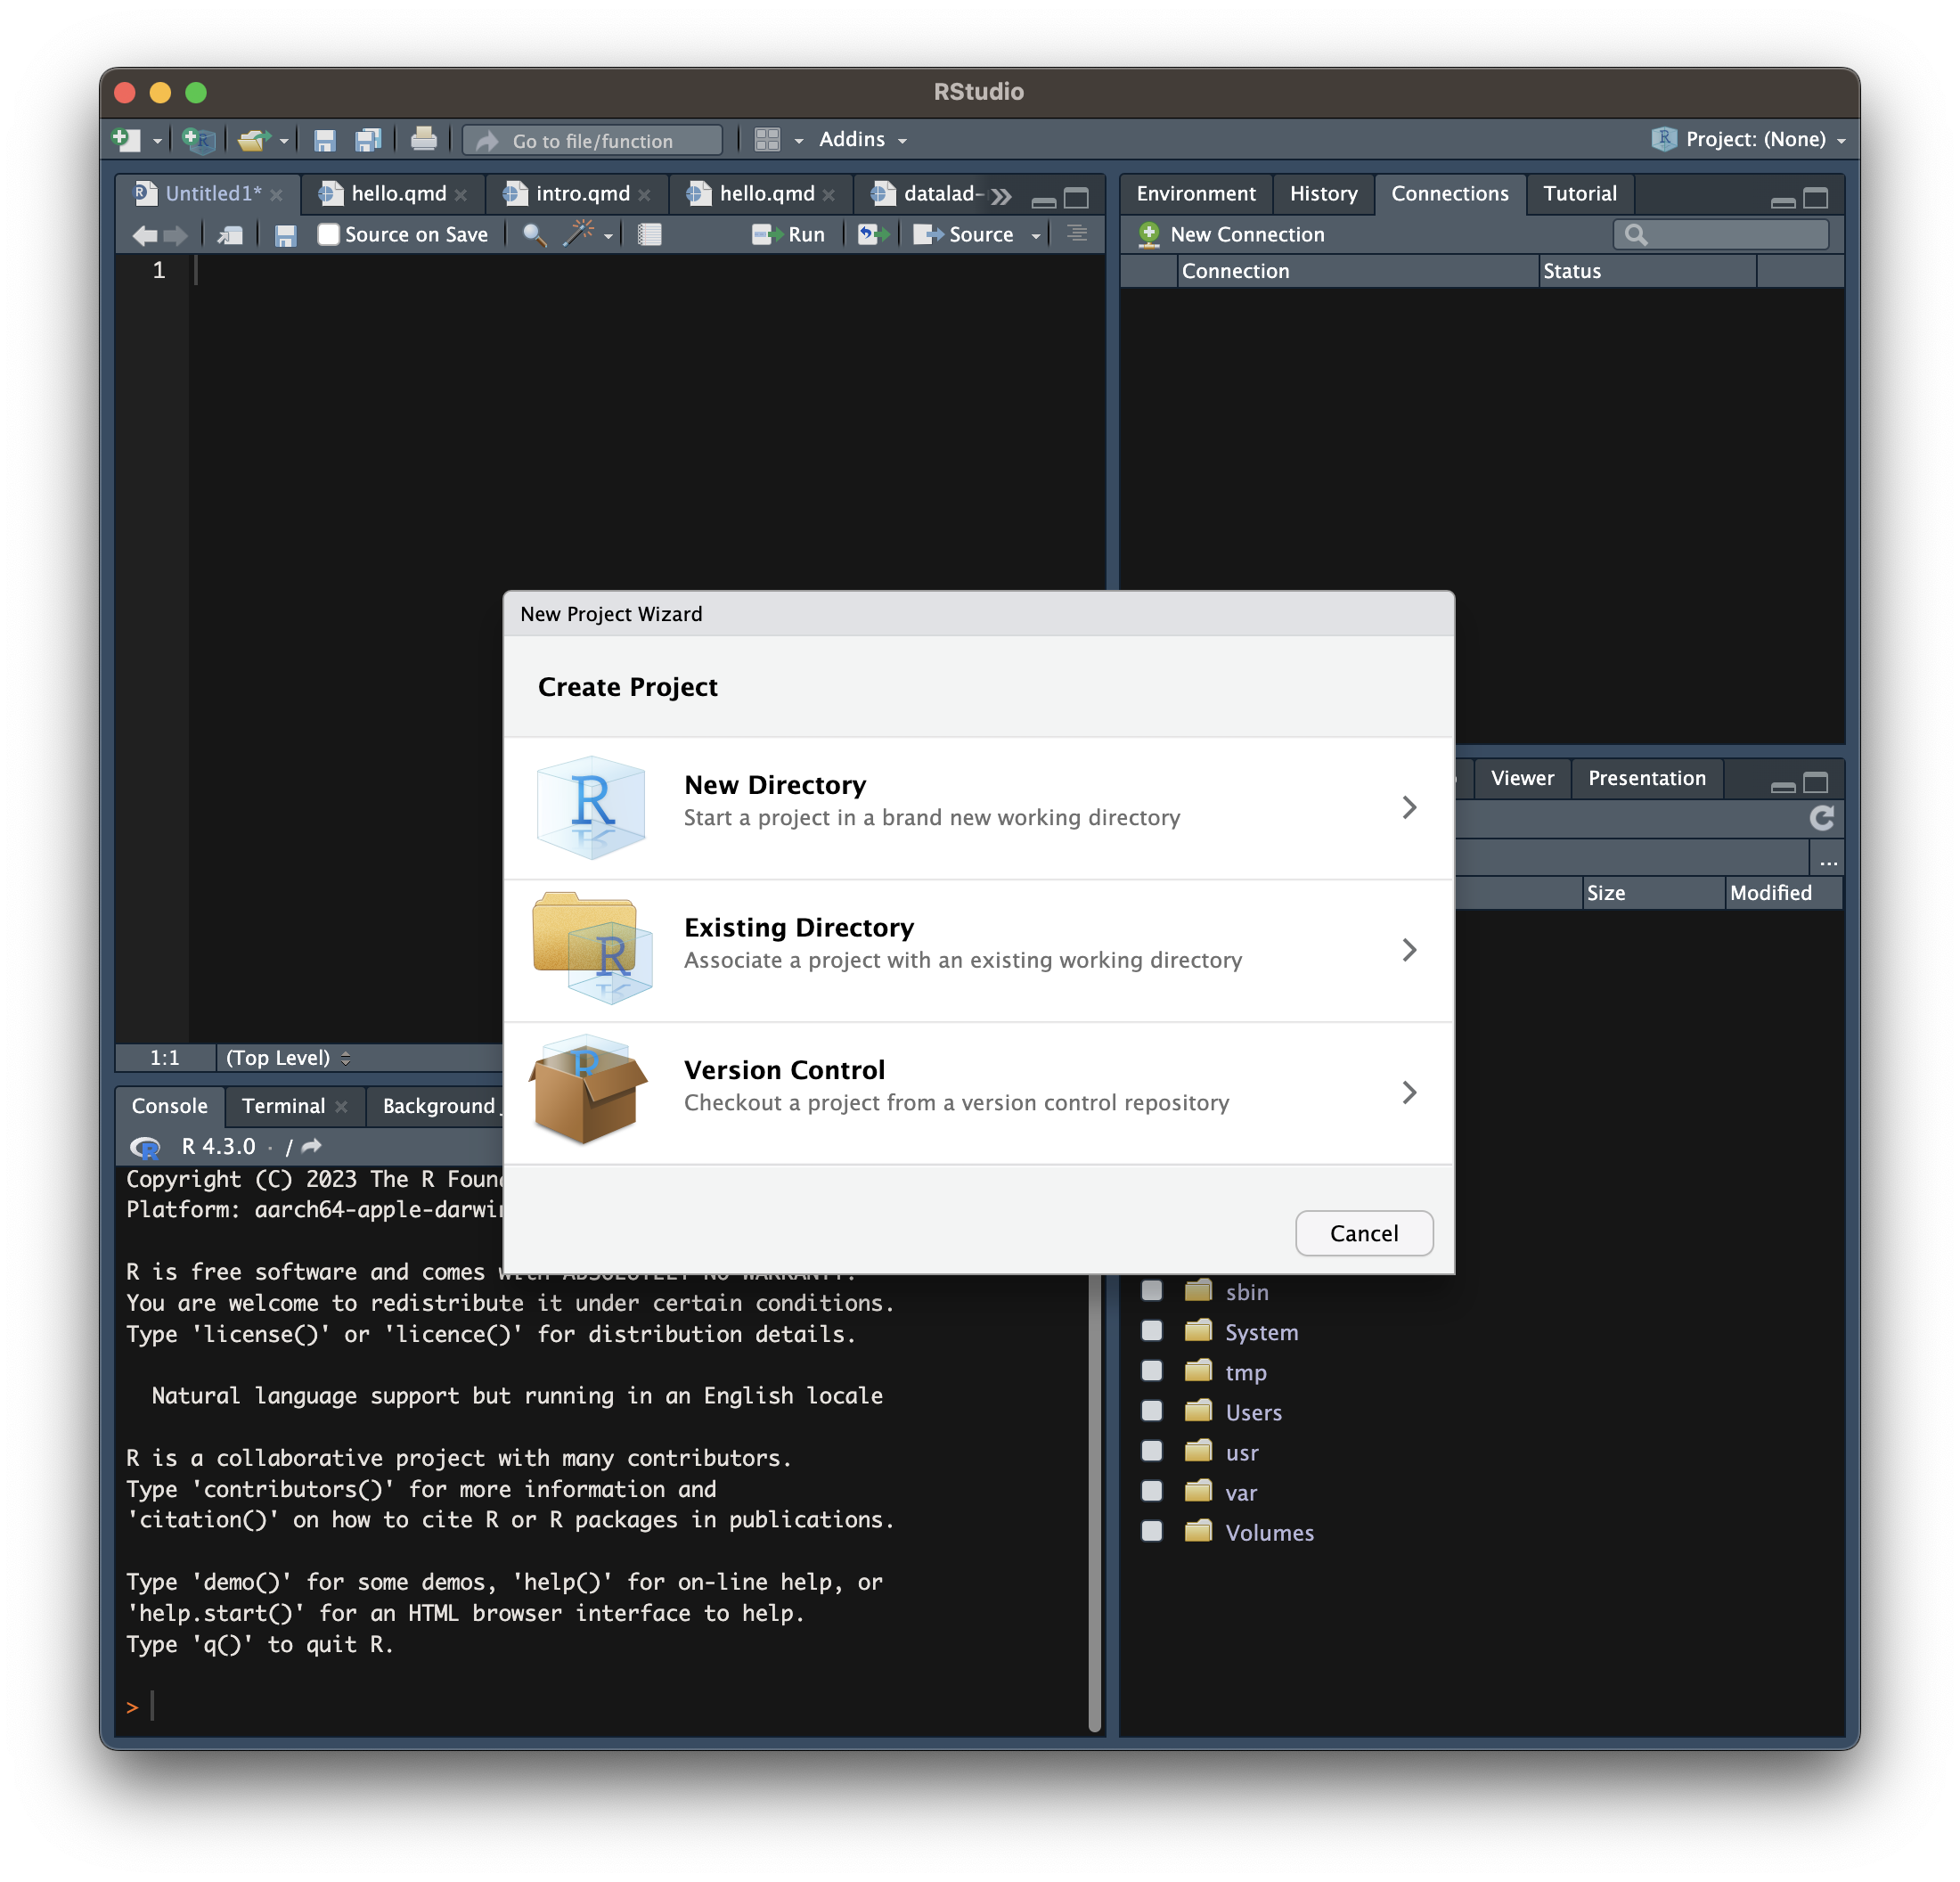
When opening a new RStudio project, you can choose to “Checkout a project from a version control project”. After choosing this, you have the option to clone a Git repository, for example from Github. RStudio will then download the files and you can start to edit them in RStudio.
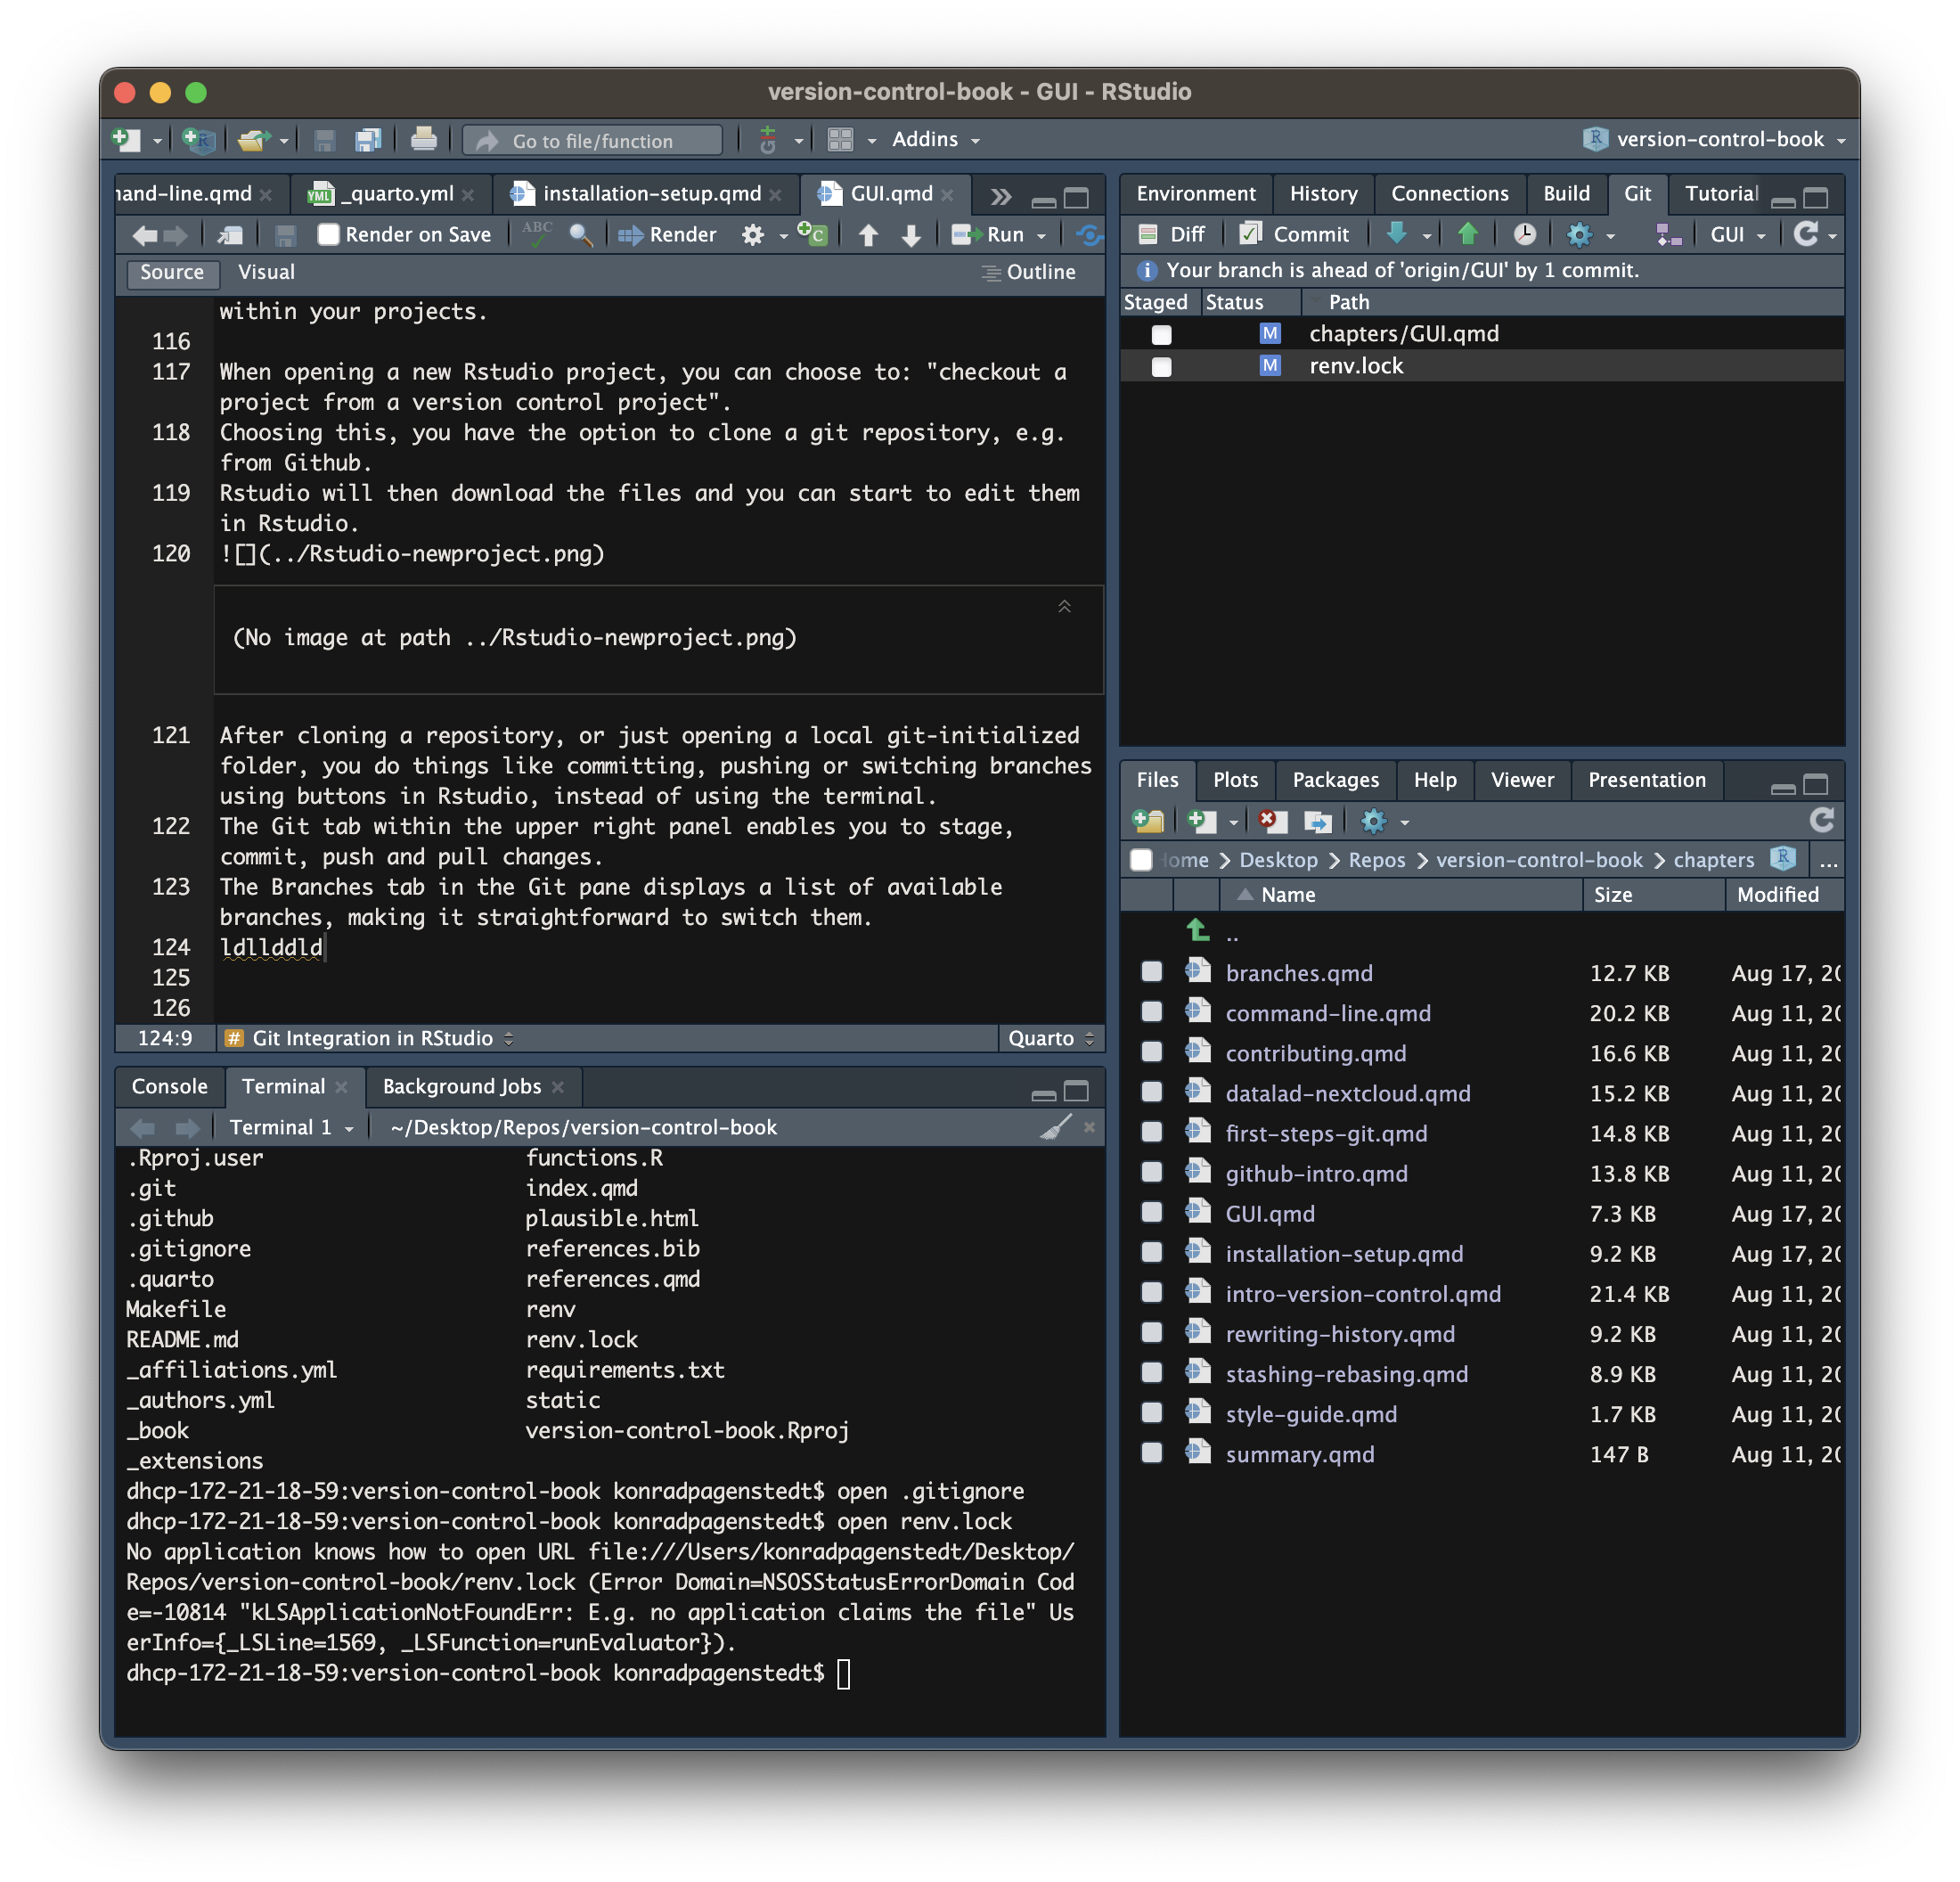
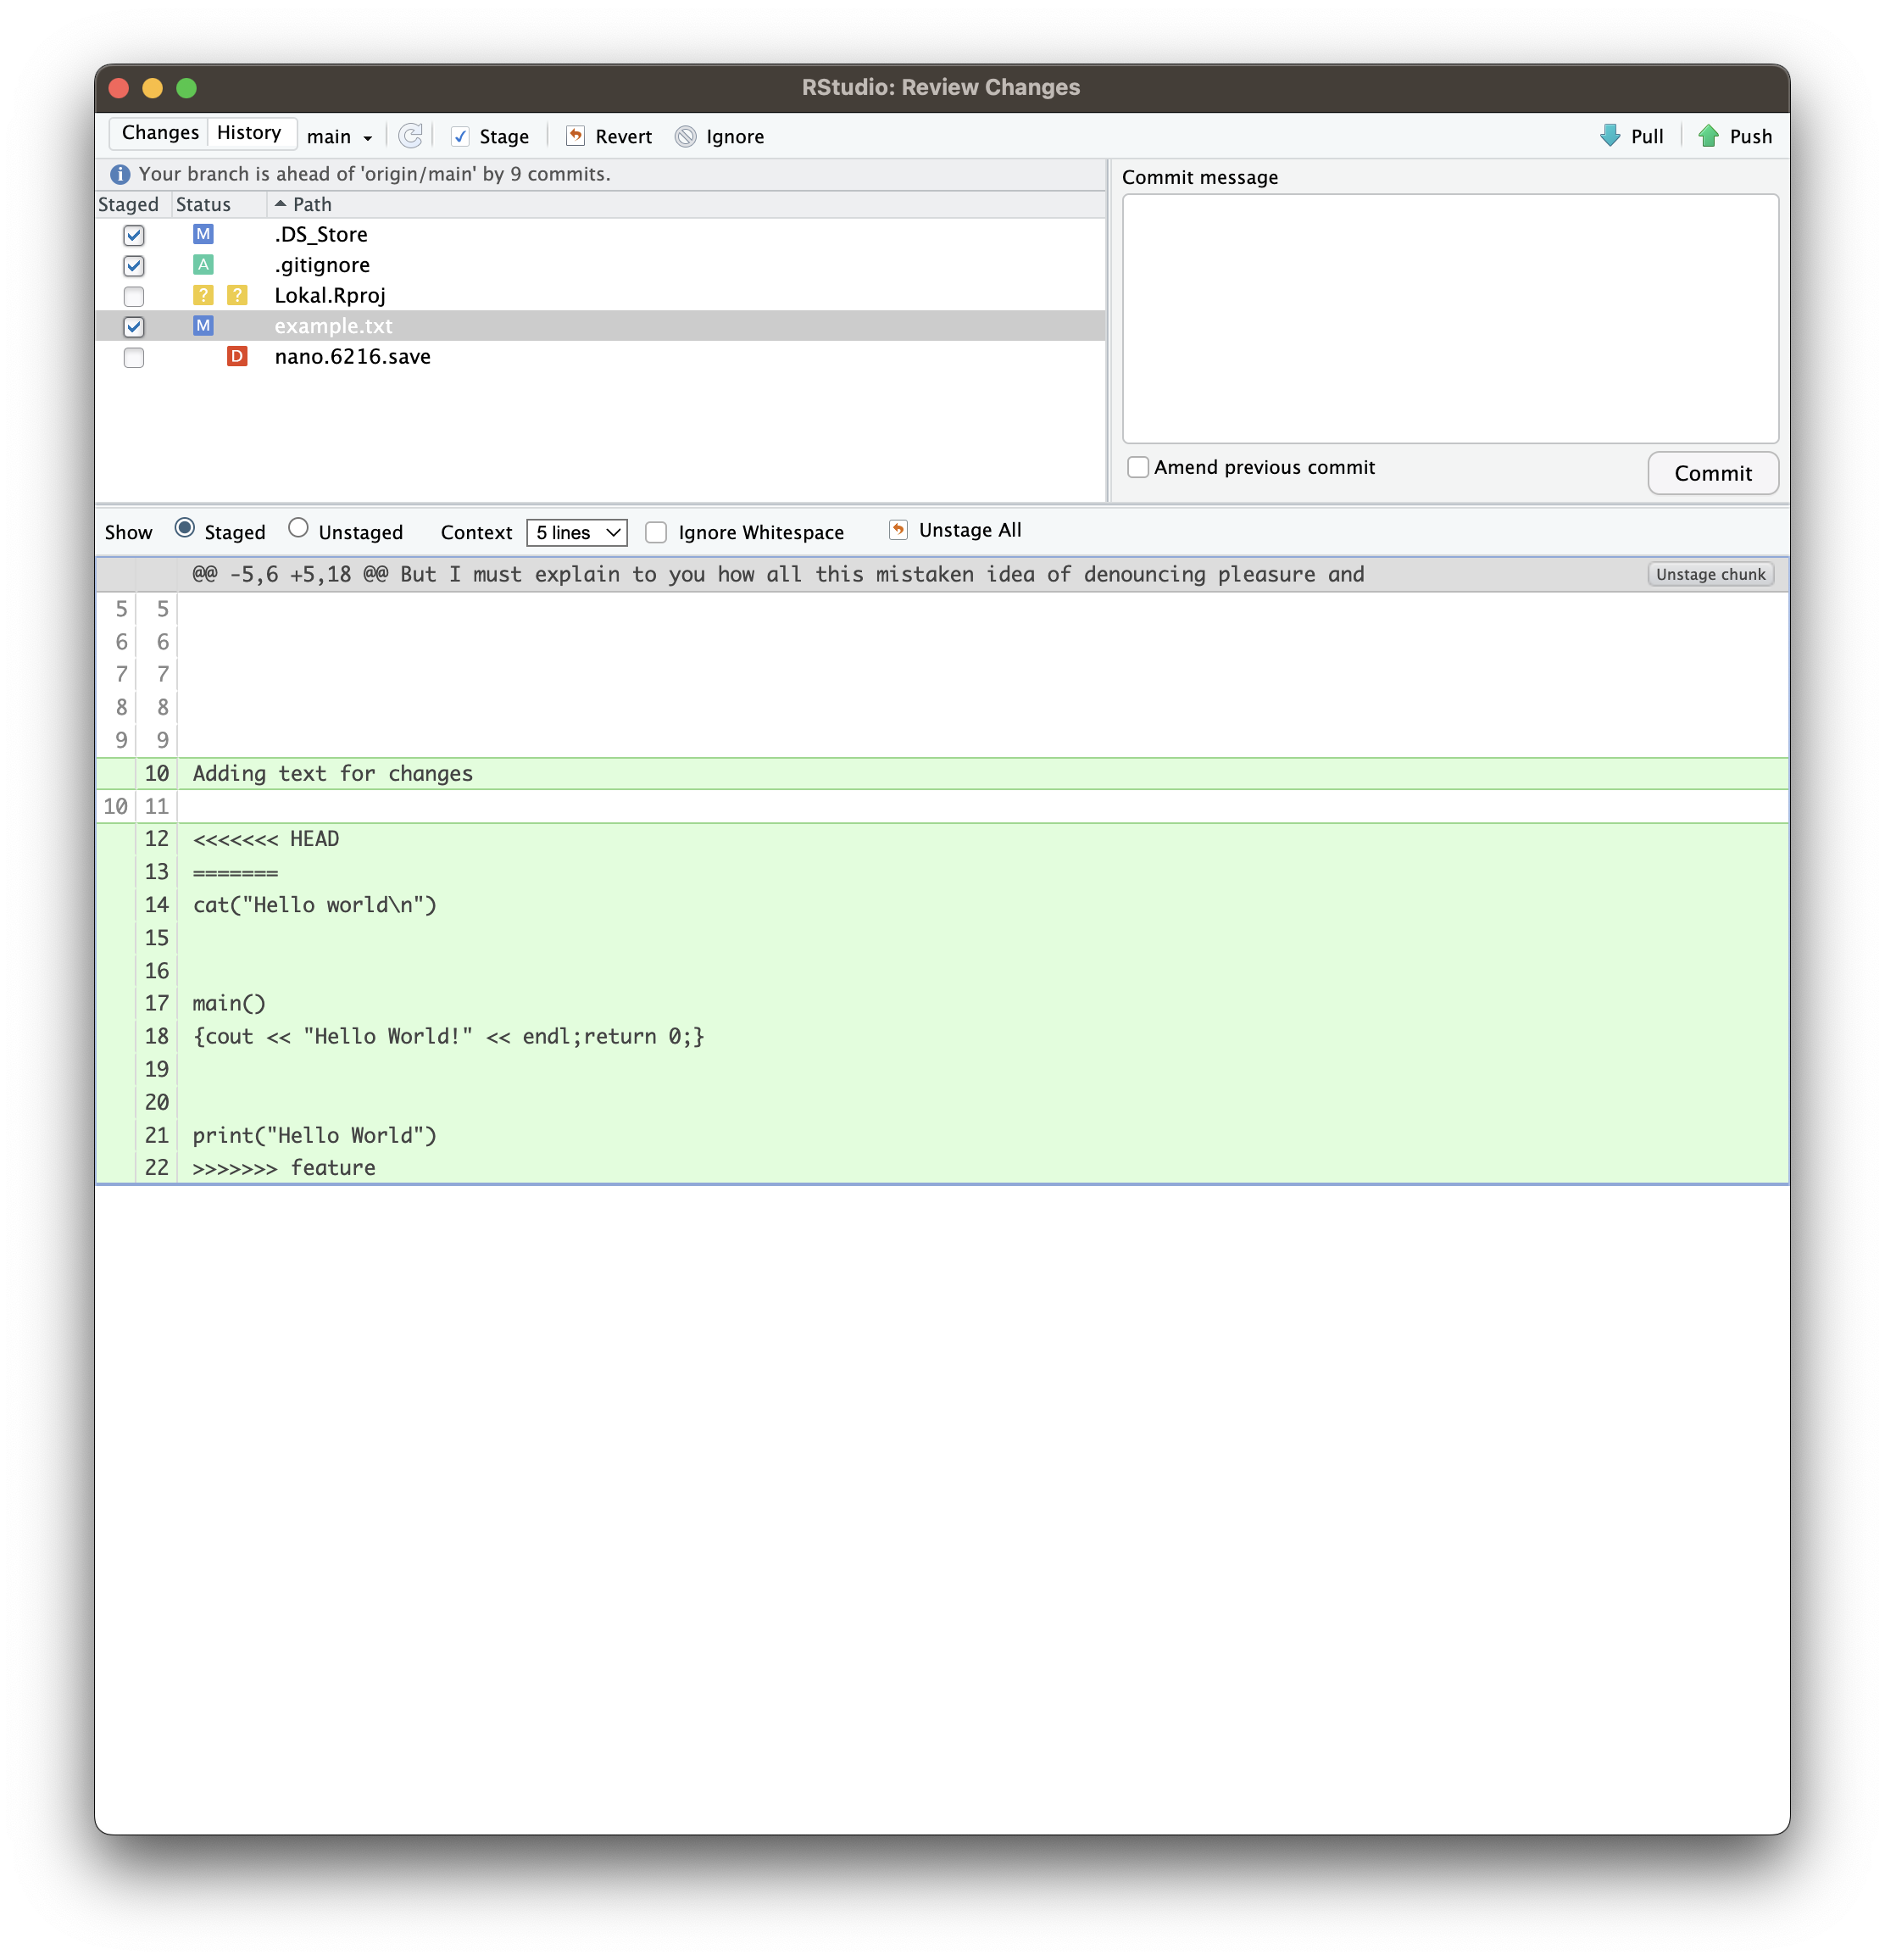
After cloning a remote repository or opening a local Git repository folder, you can do things like committing, pushing or switching branches using buttons in Rstudio, instead of using the command line. The Git tab within the upper right panel enables you to stage, commit, push and pull changes. The branches tab in the Git pane displays a list of available branches, making it straightforward to switch between them.
Clicking “Commit” will open up a window, where you see your changes marked with colors. You can also easily write a commit message and have the option to amend your last command. It is also possible to stage specific lines.
For a more comprehensive tutorial on using Git in Rstudio you can check out the “Happy Git and GitHub for the useR” by Jenny Bryan.
You should keep in mind that while the RStudio GUI simplifies many Git tasks, it lacks the flexibility and customization of using the command line. But considering you can also open a command line tab in RStudio, the GUI might be a help in your workflow, if you work on a project and track it using Git.
13.5 Acknowledgements & further reading
| Authors | Title | Website | License | Source |
|---|---|---|---|---|
| Bryan (2023) | Happy Git and GitHub for the useR | CC BY-NC 4.0 | ||
| GitHub (2023) | GitHub Docs | CC BY-NC 4.0 |